The Windows 10 Ultimate Performance mode, which is among the Windows 10 Power Options, aims to offer higher performance to users. You can get more performance from your computer thanks to this mode, which is more performance-oriented than high performance and other options. However, you may need to do some operations to see this mode.
Otherwise, you may not see this mode in the Power Options section. That’s why we will try to convey the Windows 10 Ultimate Performance activation process to you in our article. After applying the methods that we will tell you, you can enable your computer to work with performance priority by activating this mode.
Table of Contents
What is Windows 10 Ultimate Performance What Does It Do?
What does Windows 10 Ultimate Performance mode do in this section? We want to talk briefly. First, let’s talk about Windows 10 Power Options. In Windows 10 Power Options, there are options such as Balanced, Power saving, and High performance. When you choose any of them, the way your computer works is arranged accordingly.
For example, in the Balanced option, the computer is more stable in all respects, while in the Power-saving option it runs more efficiently. In the high-performance option, the computer ignores factors such as power saving and focuses on performance.
Windows 10 Performance mode, on the other hand, focuses entirely on performance, unlike the High-performance option. In other words, the purpose of this mode is to provide users with maximum performance, especially on high-spec computers. However, this mode is usually not visible in Power Options. In order to see this mode, which is not among the options at first, a few actions are required.
How to Activate Windows 10 Ultimate Performance?
To activate this mode, you need to enter a code that we can call the Windows 10 Ultimate Performance code . After entering this code in the Command Prompt, you can see this mode in the Power Options section. If you want to use Ultimate Performance mode, you can follow the steps below.
Windows 10 Ultimate Performance Mode Activation Updated
- First, open Run by pressing the Windows + R key.
- Then Run Command Prompt by typing ‘CMD’ in Run and pressing the key that says ‘OK’.

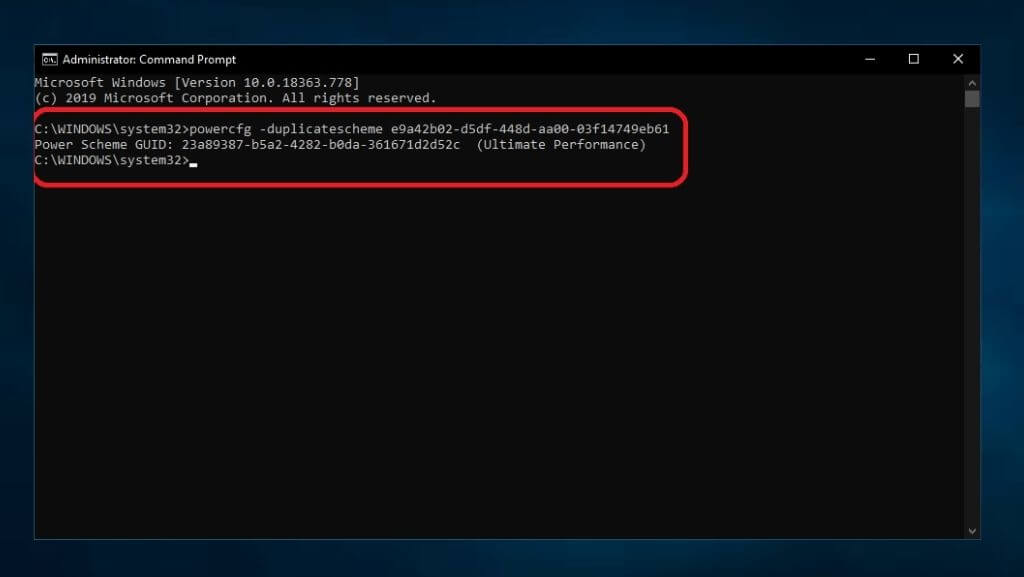
- You need to type the command ‘ powercfg -duplicatescheme e9a42b02-d5df-448d-aa00–03f14749eb61 ‘ in the Command Prompt that opens and press enter. After following these steps, you will see that Ultimate Performance is enabled on the Command system screen as well.
Read Also : How to optimize your computer for gaming window 10
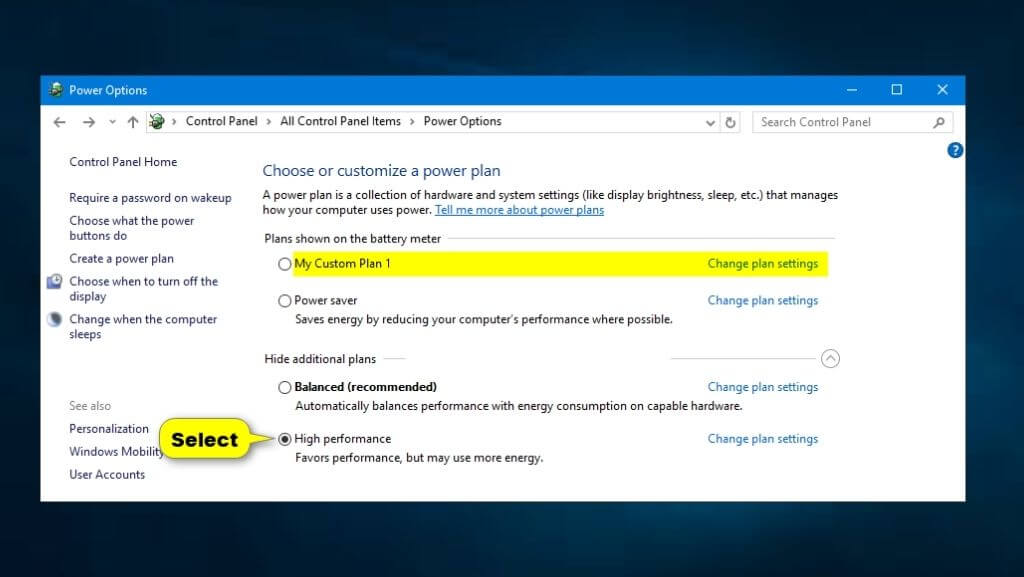
- You can see the Windows 10 Ultimate Performance mode in the “Power Options” section .
- To access Power Options, type ‘Control Panel’ in the search field in the start menu.

- Once in the ‘Control Panel’, first click on ‘Hardware and sound’ and then ‘Power Options’.
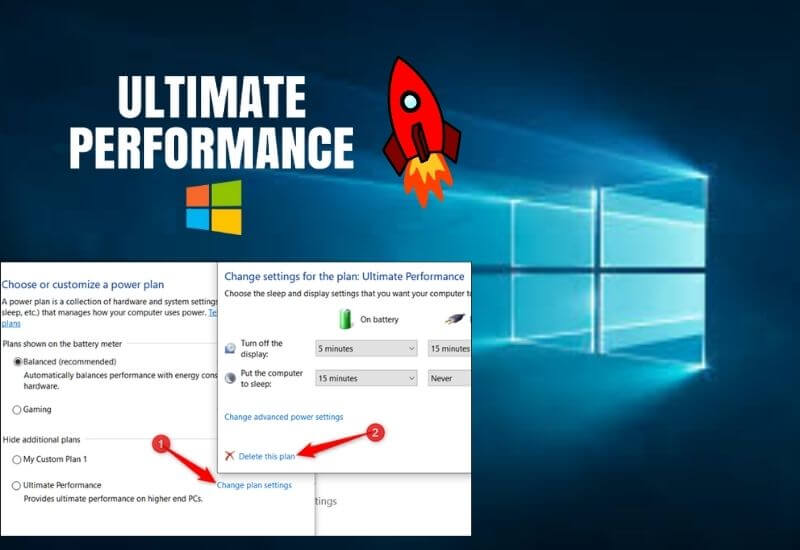
- When you click the arrow on the far right of the ‘Hide additional plans’ option in the section that opens, you can see the ‘Ultimate Performance’ option.
- Here, when you tick the box next to the ‘Ultimate Performance‘ option, Windows 10 Ultimate Performance mode will be activated.
- If you want to exit this mode, you can get your computer to the mode you want by clicking one of the other options.
How to enable windows 10 ultimate performance mode guide
We are always open to your problems, questions, and suggestions, so feel free to Comment on us by filling this. This is a free service that we offer, We read every message we receive. Tell those we helped by sharing our posts with friends or just liking to Follow us on Instagram, Twitter and join our Facebook Page or contact us on Gmail, Linkedin, etc

Pradeep Sharma is a author the mind behind Techjustify, where I craft insightful blogs on technology, digital tools, gaming, AI, and beyond. With years of experience in digital marketing and a passion for tech innovation, I aim to simplify complex topics for readers worldwide.
My mission is to empower individuals with practical knowledge and up-to-date insights, helping them make informed decisions in the ever-evolving digital landscape.


