How To Use Kinemaster For Beginners Step by Step – Editing is a very exciting activity. Moreover, now there are many qualified applications for Android creators, one of which is Kinemaster. But for a layman who is new to the world of video editing, of course, he will be confused by the many menus in the application. So, here wants to share how to use Kinemaster for beginners for editing
The steps for using KineMaster are actually almost the same as using other editing applications because the features or the edit menu have the same name (eg transitions, music, graphic clips, and others).
But so that you understand it better, will help explain how to use Kinemaster for beginners, starting with the explanation below.
Table of Contents
What is KineMaster App?
As I said above, Kinemaster is an editing application that can be obtained and used for free on the Playstore.
Although to be able to take advantage of all its features you have to subscribe, but using the free version alone is enough to meet the needs of learning editing with satisfactory results
The application developed by Nex Streaming was released in 2013 to be precise, namely, on December 26, 2013, it has been installed by more than 100 million users and has 3 million+ reviews on the play store.
With complete features, Kinemaster is the best choice for creators of Youtube, Facebook, IG, etc. Because indeed with this 1 application you can make running video videos, make subtitles, edit cinematic videos, make moving quotes, make talking animations, and much more.
And if you can’t wait to start learning this beginner Kinemaster tutorial, then just explain it below
How to Use Kinemaster For Beginners
Below is a collection of complete KineMaster tutorials that are easy to understand and also an explanation of editing in general.
Please watch and practice immediately so you can quickly make the video you want.
How to easily create videos on Android with KineMaster
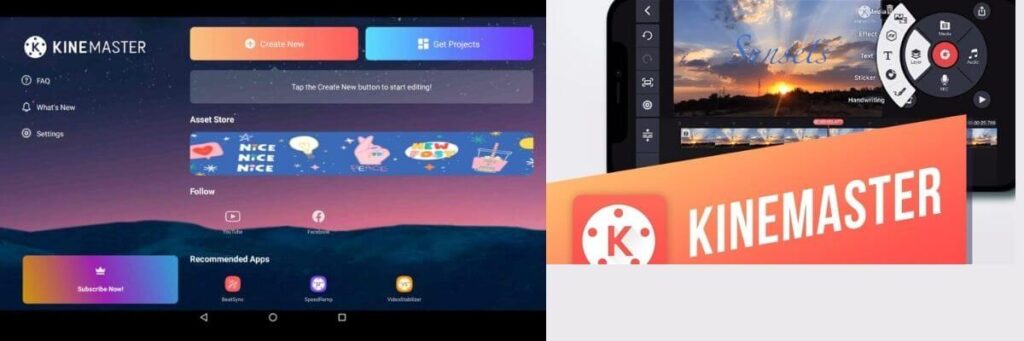
How do I use the Kinemaster application? Well okay when you want to start editing, then, of course, you must have the Kinemaster Pro which you previously downloaded from the Playstore or from Google.
After that, you can open the application first, then there will be several menu options. Here you just select the add button or the button to create a new project.
After that, you will be presented with a choice of 16:9, 9:16, and 1:1 ratio sizes, you can choose according to your needs (for example, if you want to use it to upload to YouTube then choose 16:9).
Next, you will enter the media, here you can enter videos, photos, or plain colors that the application defaults to. You can also select multiple media at once, but you can add more later when you start editing.
So just select the video or photo that you want to edit.
This is the first step to include animations in KineMaster, create talking animations on android, create animated learning videos in Kinemaster, make handwritten videos with Kinemaster, and all things editing in the application.
How to Add Text in Kinemaster

After you determine or choose both photos, background colors, and videos, you can immediately start basic editing, namely making moving text in Kinemaster.
And to start making running text on video or more precisely how to make moving text in Kinemaster, you can click the layers menu and then select the text menu.
Next, please just type the text you want to include in the video and click select when you’re done. You can also change the font type by clicking the Aa menu on the right side of the screen.
Then you can also make colorful writing in this kinemaster or change the color by clicking the white box to the right of the scissors icon. While the scissors icon serves to cut the length of the duration or display time of the text.
And to make text like typing yourself in a video, you can give incoming and outgoing effects or the overall effect on the text.
But here I’m an example for the entry effect, yes, you can click the entry animation menu, and please select the one letter by letter. Then you can also adjust the speed of the effect by setting the timeline below the effect option.
With these many options, you can easily make typed videos, make Kinemaster running lyrics, make running texts on videos, make subtitles in Kinemaster, make text flash in Kinemaster, and much more.
How to Add Music, Sound Effects, and Record Sounds in KineMaster

How to do voiceover in KineMaster? You. To add back sound or transition sound effects, you can do this by clicking the audio button with the music icon on the right as shown above.
After that, the music that you have on the cellphone will appear, but on the left, there are several other buttons that you can choose to select music from the Kinemaster application including music, SFX, record, songs, albums, artists, music genres, and folders.
So, for how to use Kinemaster, especially about this audio, you should just explore it as you like to get the music that suits your needs. If you want to record, then you can select the record menu and just allow the application to record sound.
How to Add Audio & Video in Kinemaster

After successfully adding text and music, maybe you want to add more videos or additional photos. Now if you really want to add it, then you can just click the media menu.
After clicking, you will see several video and photo files like the first one, and you can directly click on the item to be used.
But if you want to include the video component that you want to remove the background from then you have to select the layer menu and then select media. After entering the green screen, you can select the chroma key/chroma key menu.
How to Add transition in kinemaster and Other Useful Features

There are some very useful basic features in Kinemaster that you can use to enhance your editing, including:
Transition is a transition effect from video clip 1 to video 2 and so on, or more easily we can call it a video clip connection smoother.
This transition itself can be added if there are 2 or more video clips added. So every time you cut or add media in Kinemaster, the connection gap will have a square button.
Now by clicking the box button, then you can provide the transition according to your wishes. If you want other transition effects, you can also download it at the Kinemaster pro store (most of which have to be subscribed first).
- Color Filters In Kinemaster there is also a choice of color filters, so you can choose a video effect that you can adjust to the colors of the original video to make it look more attractive
Read Also : How to cartoonize your face and Photo
In addition, there are also adjustment features that you can use to customize effects, such as brightness, contrast, saturation, vibration, temperature, highlights, shadows, gain, gamma, lift, and hue.
There is another vignette feature, which you can use to give a dark effect on the edges of the video. Anyway, some of these features you can use to decorate the videos that you edit.
Clip Graphics By using this feature, you can add text or animation effects to a clip that you are editing. So every clip that you add will appear as a graphic clip according to the one you selected. For example, if you choose a text graphic clip type in the first clip, then only in the first clip the effect will appear when the video is playing. Yes, there are actually many choices of good features to use, but these 3 features are the most commonly used for editing.
How to Save a video from Kinemaster to Gallery

After you successfully apply how to use Kinemaster or make videos according to what you want, then you can then save the edits to the gallery.
Now to save it, you can click the save icon at the top right, then the export screen will appear. You can set the video resolution, frame rate, and bit rate of the video you want to save.
After the settings are right, then just click the export button to do this storage, and please wait for the rendering process to finish. The speed of this process depends on the length of the video you save and the resolution you choose.
Conclusion
So How To Use Kinemaster For Beginners and how to make videos with KineMaster?
As you already know, that using Kinemaster is for editing and not for the video recording process. Because the application was created and optimized as a video editing application.
So if your intention is to make a video on KineMaster or to record the video then it is not suitable and you should undo the intention.
But if you want to edit, for example, take a simple example like making a moving clock logo, then you use the right application.
You can download the kinemaster animation raw and then you can give cool moving effects, and you can also adjust the moving animation background at the same time with the background.
Anyway, Kinemaster is the best editing application on Android that you should try, especially if you are a YouTube creator who only has a cellphone.
By learning how to use Kinemaster for beginners, you will go a step faster and become a successful YouTuber with amazing video results.
We are always open to your problems, questions, and suggestions, so feel free to Comment on us by filling this. This is a free service that we offer, We read every message we receive. Tell those we helped by sharing our posts with friends or just liking to Follow us on Instagram, Twitter and join our Facebook Page or contact us on Gmail, Linkedin, etc

Lokesh Sharma is a digital marketer and SEO expert at TechJustify with a keen interest in emerging technology trends including AI, cybersecurity, and digital marketing tools for more than 5 years. He writes clear, actionable articles for tech enthusiasts and business leaders, simplifying complex topics like VPNs, automation, and generative AI.