How to Fix Laptop Touchpad is Not Working (5 Ways) – That the touchpad or touch panel of a laptop does not work is quite an important task. We can always use a USB mouse to get out of trouble, although that is still a temporary solution.
Table of Contents
How to Fix Laptop Touchpad is Not Working (5 Ways)
If we require to find the reason for the problem we should two choices: whether it is a hardware crash or a software failure. In most cases, the problem is usually the latter, since touch panels rarely break down at the hardware level (although everything is possible, of course).
Possible causes
Of course, before sending the computer for repair we must rule out any software failure. Hopefully, we can even fix the problem ourselves. With that said, these are usually the 3 most common causes that cause the touchpad to stop working:
- The touchpad enable button on the keyboard is disabled.
- The touchpad drivers are outdated or outdated.
- The touch panel settings have changed.
From here, to operate, we will need to connect a USB mouse. While the touchpad is disabled this will be the only way to navigate between the various menus and system configuration settings.
How to fix a broken touchpad on a Windows laptop
To solve the problem we will carry out a battery of 6 different tests, which will help us to rule out errors until we find the correct key.
1. Activate the touchpad from keyboard

Most laptops usually have a key or combination of keys to activate and deactivate the touchpad directly from the keyboard.
If you think that it could be deactivated by mistake in this way, you can reactivate it simply by pressing the relevant key combination.
Each manufacturer may have this button in a different location. Some laptops, for example, have the touchpad activation function on the F1 key.
If this is your case, press the Fn + F1 key and check if the panel is operational again.
2- Run the Troubleshooter
The Windows Troubleshooter can be an excellent help to detect and repair common problems with the components of our PC. Before continuing with other checks, launch the Windows solver for “Hardware and devices”:
- Type in the Windows search engine the command “cmd” and hit enter to open a terminal window.
- Run the following command (without quotes): ” exe -id DeviceDiagnostic “
- This will open the solver for computer hardware items. Follow the instructions and once finished restart your computer.

3- Update the touch panel drivers
The drivers are the ones in charge of the communication between the hardware of the touch panel and the software of your operating system.
If the drivers or controllers are out of date this can cause a malfunction. To update the touchpad with the latest drivers, follow these steps:
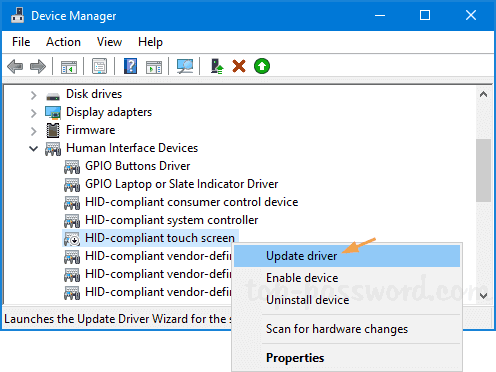
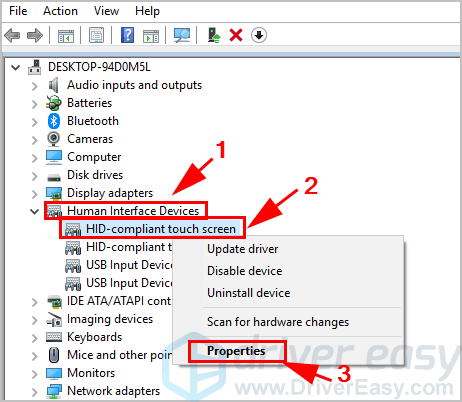
- Press the key combination Win + R and type the command ” msc ” (without quotes). This will open Device Manager.
- Locate the option ” Mouse and other pointing devices ” and open the drop-down.
- Select your touchpad and right click with the mouse. Click on “Update driver” and follow the prompts.
In the same way, you can also go to the laptop manufacturer’s website and download the latest drivers for your touchpad.
4- Check the touchpad settings
Each manufacturer offers different adjustment options for the touch panel. In my particular case, I have a Dell that doesn’t allow me to completely disable the touchpad, but it does allow me to tweak other settings.
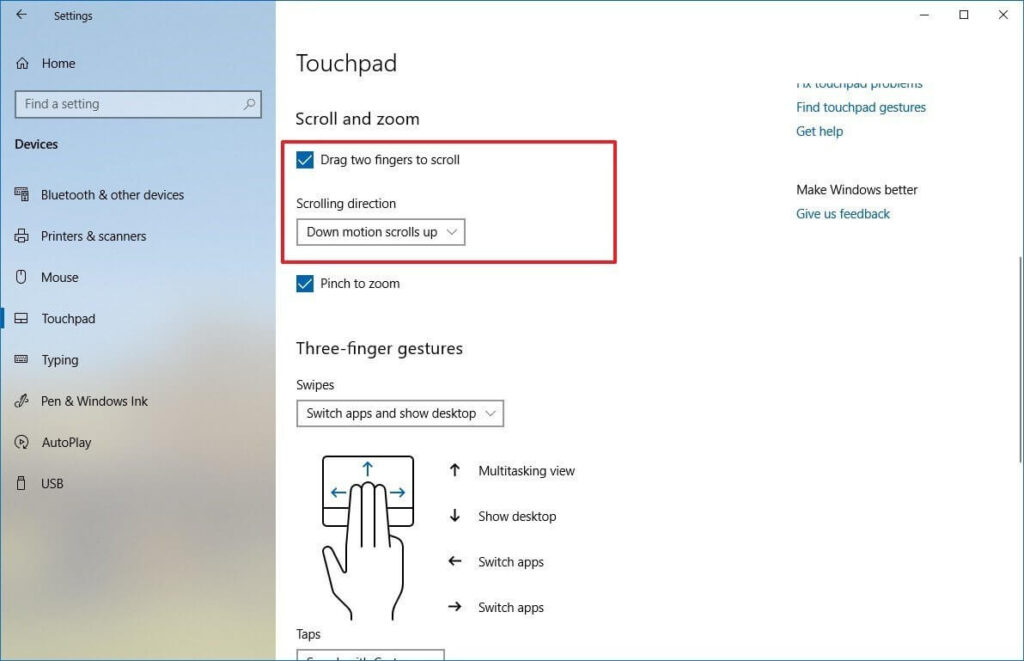
You can check your touch panel settings from ” Start -> Settings -> Devices ” by clicking on the ” Touchpanel ” option.
Most panels usually have a sensitivity adjustment: open the drop-down and activate the “Medium sensitivity”. Then restart the laptop.
5. Enter the BIOS settings
Pointing devices (i.e. the touchpad) can sometimes be disabled from within the BIOS itself. To check that everything is in order, restart your PC and enter the BIOS menu.
It is different on each PC, but it is usually accessible by pressing F8, F12, DEL, or ESC just when the computer starts up.
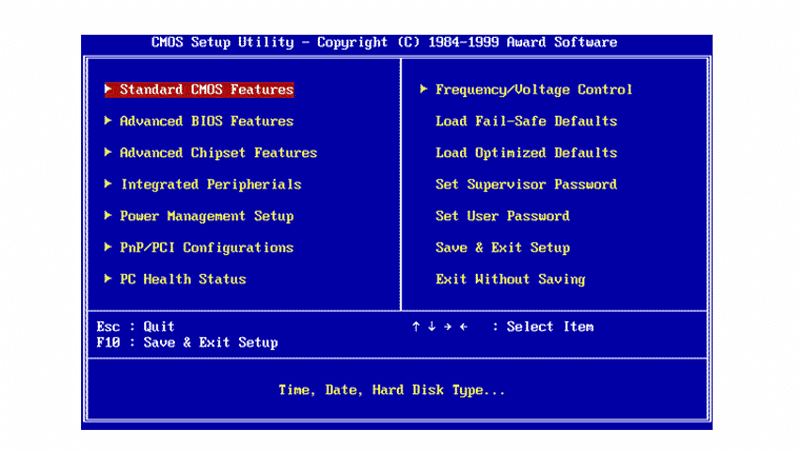
Once inside the BIOS go to the advanced settings and verify that the pointing device or “Pointing Device” (in English) is enabled or “Enabled”.
If you want to stay up to date, follow us on Instagram, and Twitter. If you want to receive support for any questions or problems, join our Facebook Group or contact us on Gmail, Linkedin, etc

Pradeep Sharma is a author the mind behind Techjustify, where I craft insightful blogs on technology, digital tools, gaming, AI, and beyond. With years of experience in digital marketing and a passion for tech innovation, I aim to simplify complex topics for readers worldwide.
My mission is to empower individuals with practical knowledge and up-to-date insights, helping them make informed decisions in the ever-evolving digital landscape.