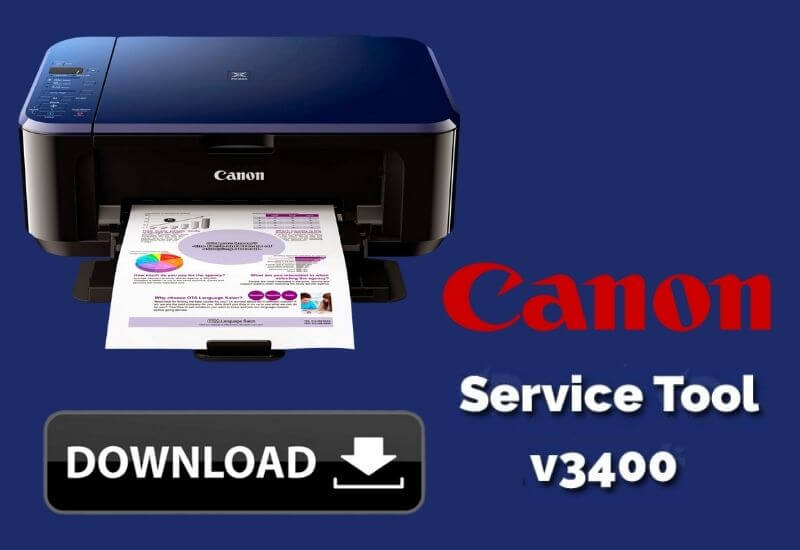
Service Tool v3400 – On this occasion, we will discuss some things about Service Tool v3400 that you should know. Please see the full explanation below.
As the name implies, which is a service tool, Resetter Canon Service Tool v3400 is software that functions to repair various types of errors and errors that occur on Canon type printers.
This software can be used for various types of canon printers from the old version to the latest version at this time.
Printer errors will certainly be a troublesome problem for everyone. Especially for those of you who have business or school matters related to printers.
Therefore, the latest v3400 service tool is something that you must have to minimize the possibilities that will happen to your printer.
As we all know that the printer is a technological tool that makes it easy for us to print anything.
But along with frequent use, the printer will certainly experience certain problems. Especially when we don’t really understand printer problems.
Printers themselves sometimes have problems with internal parts that can haunt us at any time. Therefore, we must have preparations to fix it with software.
For external problems, such as paper stuck in the printer and other problems, we can handle it ourselves or go to existing service providers.
Table of Contents
Review Service Tool v3400
In this Service Tool v3400 software, you can access various features that can solve various internal problems that you have with the printer.
This program can also be said to be a resetter for the printer. Because most of the problems on the device can be solved by resetting it as well as on the Laptop.
But first you have to download the Resetter Service Tool v3400 software first with the link we have provided below along with how to install the software.
The resetter application can be used when the printer cannot be turned on, cannot be moved, or cannot be started at all.
Its characteristics are a message that appears on the computer with the words “Ink Absorber Full”, meaning you need the Resetter Service Tool.
Resetter Service Tool v3400
| Name | Resetter Service Tool |
| Version | v3400 |
| Uploaded | 21 july 2025 |
| Size | 9,5MB |
| Download Link | Download |
Steps to Install Resetter Service Tool v3400
Here are some steps you can take to install Software Resetter Service Tool v3400:
- You click the download link that we have provided above.
- Please download Resetter Service Tool v3400 first at the link.
- After completing the download, look for the downloaded file.
- Then you extract the file to the desired place.
- Or if you don’t understand, please right click on the file then select “extract here”.
- Wait until the extract process is complete.
- Open the extracted folder and then double click on the service tool v3400.exe.
- Follow the installation instructions provided until the installation process is complete.
- Open and fix.
- Finished.
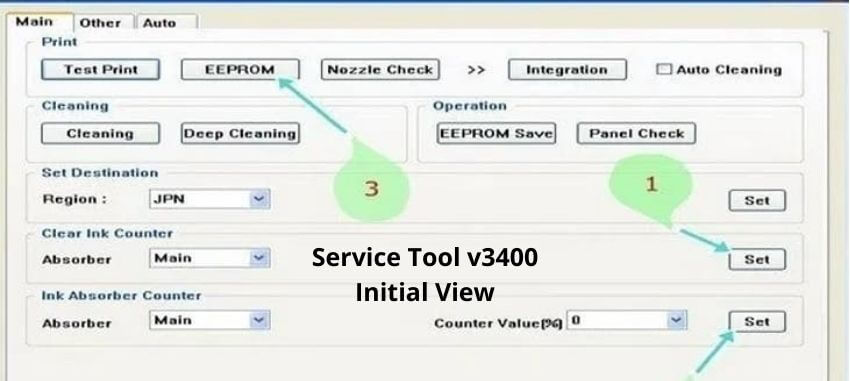
Resetter Service Tool v3400 Initial View
After you finish installing the Resetter Service Tool V3400 software, you must be confused about how to use it.
When you first open the Resetter Service Tool software, you will find three main menus in this software, namely the Main, Other, and Auto menus.
Here we will discuss some of the initial views of the Resetter Service Tool v3400 software along with an explanation of the three menus. The following is an explanation of the Service Tool V3400 menu, namely:
1. Main
The main menu on the Resetter Service Tool V3400 software contains several options as follows.
In the print section there are options:
- Test Print: Tests the printer in printing something.
- EEPROM : Contains information about printer failures and their solutions.
- Nozzle check: Checks the ink nozzles on the printer.
- Integrated : Inspect the printer as a whole.
- Cleaning: Perform cleaning on the printer.
On the main menu you can also reset the ink counter and ink counter settings.
2. Other
On the other menu, you will see many columns with different names. Some parts of the other, namely:
- CD-R Correction
- LF/EJECT Correction
- Auto LF / EJ (1)
- Auto LF / EJ (2)
- Left margin correction
- Operation
- Wetting liquid counter
- Rank panel, and
- Flatbed scanner.
3. Auto
The auto menu contains a series of basic operations on the machine after repair. This menu cannot display problems other than a basic set of operations.
Ensuring Service Tool v3400 Readiness
To ensure that the Resetter Service Tool v3400 software can run properly on your laptop, you must follow the various steps below because you are afraid that some errors will occur.
- Make sure the printer you have is connected to your laptop either by USB or Wifi connection.
- Also make sure on your laptop that the printer that is connected is the printer in question.
- The printer was once connected to your laptop so there is no need to install the printer to the laptop anymore.
- After confirming the three things above, you can already carry out the repair process with the software according to the problems you have.
Supported Printer Type
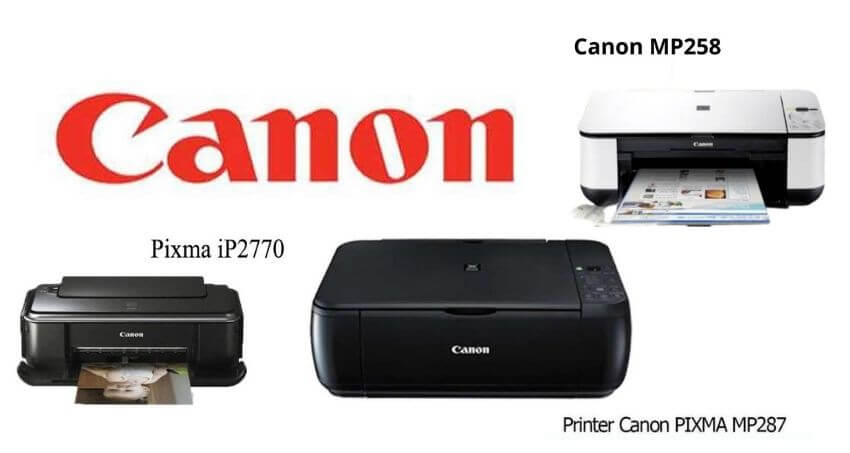
Not all types can be compatible with this Resetter Service Tool v3400 software, but some are common types as follows:
- Canon IP2770.
- Canon MP287.
- Canon MP258.
- Canon MP236.
- Canon MP2260.
For the types mentioned above, it will most likely be compatible with Resetter Service Tool v3400.
Error Code
There are some common error codes on printers as follows:
- Error Code 002
- Error Code 005
- Error Code 006
- Error Code 009
How to Solve Printer Errors
If there is an error when you open the service tools software and press EEPROM, then you can solve the error while resetting your printer in the following way:
- Try opening your printer cover, wait until the cartridge place stops in the middle.
- Remove the color cartridge and then close the cover of your printer again.
- Especially for the MP258 printer, wait until your printer displays the number 0.
- Run Resetter Service Tool v3400 again then click EEPROM.
- Close Resetter Service Tool v3400 and the light on your printer will turn on and flash up to 5 times.
- Reopen the printer cover then wait again until the cartridge is in the middle.
- Reinsert the cartridge that was previously removed.
- Close the lid.
- Unplug your power cable from the socket, then plug it back in.
- Enter service mode.
- Then run the program again.
- Click EEPROM and select SET.
- Done, your printer has been successfully reset.
How to Use Resetter Service Tool v3400
After making sure that the Resetter Service Tool v3400 application is ready to use, then do the following:
- Press the Power button to turn off the printer.
- Leave the printer off with the cable still plugged into the PC or laptop.
- Press and hold the Reset/Stop button for about 2 seconds.
- After that, simultaneously press the Power button until the printer indicator light turns green.
- Continue by releasing the Reset/Stop button without releasing the Power button.
- Next, press the Reset/Stop button five times. Watch until the orange and green indicator lights light up alternately.
- Wait until the indicator light turns orange.
- If the printer is already in Service Mode , then you can extract and run the Resetter Service Tool application.
- Open the Resetter Service Tool v3400 Application
- Make sure the USB cable is connected properly.
- For your reference in matching the problem with the solution, please print out the EEPROM information.
- Then select your region in the “region” column then click SET.
- In the ” clear ink counter ” column, select MAIN, then click SET. After that there will be a process of calculating the ink absorber which will be reset which results will be printed automatically.
- In the “ink absorber counter” column, select MAIN, then click SET.
- Prepare the paper in the printer.
- Please reprint the EEPROM information after the reset.
- You compare the results of the EEPROM information from before to after the reset.
- If the whole process has gone well, close the Software Resetter Service Tools application.
- Then turn off the printer and wait for 10 seconds.
- Turn on your printer again and now the printer is ready to use.
Those are the steps you have to follow in using the Resetter Service Tool v3400 application.
How to Take Care of the Printer
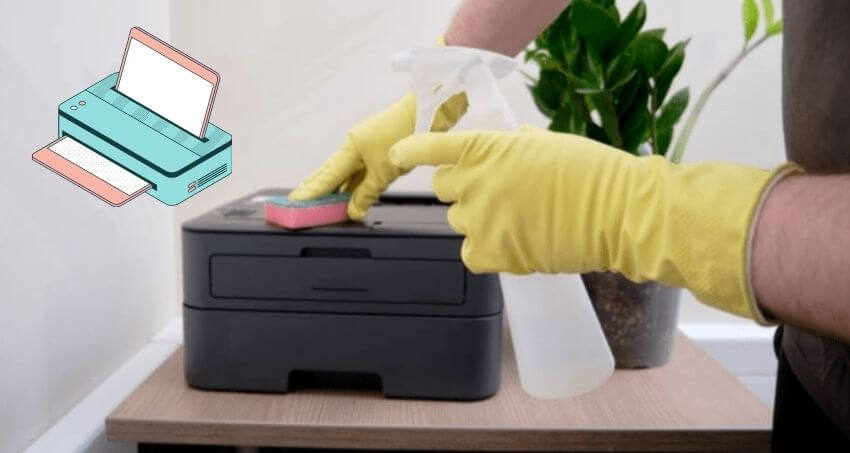
After you have managed to fix the problem with the printer, you should take care of the printer you have with good and correct care.
This is very important for you to do to keep your printer durable and long-lived. Printer maintenance must be done regularly to avoid damage to the printer.
Here are some tips in maintaining the printer.
1. Using the Right Ink
The use of low quality ink will affect the performance of the printer engine.
Automatically your printer needs to work harder if you use low quality ink.
You can equate this with the use of quality gasoline and oil on a motorbike, of course your motorbike needs extra performance in processing fuel and oil if it is of low quality.
So in using this ink, try to use high quality ink to maintain the health of your printer.
2. Avoid Using the Printer for Too Long
In using the printer, also try to minimize the duration of using your printer in order to avoid overheating the printer engine.
Frequent overheating of the printer engine will cause the printer to be vulnerable to damage that will occur.
You should immediately turn off the printer if it is no longer in use, because like a machine, the printer needs a break.
In turning off the printer is also considered well. Do not immediately unplug the printer cable from the socket, but after pressing the power button, make sure every light on the printer is completely off, then you can unplug the printer from the socket.
3. Avoid Printing Too Much at One Time
If you want to print, also try not to print too many at one time.
For example, if you want to print 50 sheets, then you should divide it by printing 10 sheets 5 times with a time span of 1-5 minutes (adjusted according to the quality of your printer).
This is not only done with the aim of avoiding overheating , it will also cause the quality of your prints to be good and clear.
4. Diligently Change Printer Infusion Hose
You should often observe the infusion hose on your printer, because as you use the printer, it will cause the infusion hose to become increasingly dirty.
This will cause the ink flow to the machine to be not smooth. therefore you should be diligent in cleaning the infusion hose on the printer.
5. Diligently Use the Printer
Get used to using the printer regularly / not letting the printer idle for too long. Because in the printer there are spare parts that function to move the printer engine.
Meanwhile, the spare parts contain lubricants that can accelerate the performance of the printer. Therefore, if your printer has not been used for a long time, it will cause the lubricant to dry out.
The dryness of the lubricant will certainly slow down the performance of your printer and decrease the quality of the resulting prints.
Routine use of the printer will also maintain the quality of the printer cartridge so as not to decrease. Because there are several types of ink that can cause deadlock in the cartridge or printer head if your printer has not been used for too long
6. Pay attention to where the printer is stored
You should pay attention to where your printer is stored and try to keep it free from dust and other risks of damage.
Because some machines on the printer are very susceptible to damage when exposed to dust. So it’s best after using your printer cover it with a cloth to avoid the entry of dust.
Also, try to place your printer in a high place to avoid the wires being bitten by mice and the risk of other damage.
7. Do a ” Clean Head “
This process is the most frequent and common way in the printer maintenance process.
The goal is that the printer head is not clogged and is able to absorb ink well so that it is able to channel the ink to the paper perfectly and produce good prints.
Every printer generally has this clean head maintenance system. Please read the manual that came with the new printer when you bought it. Because each printer brand has a different way of doing the clean head process.
However, it is recommended not to do the clean head process too often . Try to do a clean head once or twice a week as this can cause the ink tank to not hold the ink or become flooded.
8. Perform Cartridge Performance Maintenance
Not many people know about this treatment process, but in our opinion this process is quite effective in maintaining optimal cartridge performance.
The way to do it is as follows:
- Make 4 red, yellow, green, black circles in Microsoft Word
- Print the circle with the highest quality
This method is very forgiving to maintain the performance of the cartridge as well so that we can find out whether the printer can still print colors clearly or not.
9. Change the ink before it runs out
You should not forget how to take care of this printer. Regularly check the condition of the ink in the cartridges. Do not let you do not realize that the ink has run out when you want to print.
If you use the printer with the ink running out, the printer will definitely experience an error. This will certainly make the cartridges in the printer abnormal.
When things like this happen frequently, over time the cartridges will no longer be able to function optimally.
service tool v3400
Hopefully, you are like these 7 Easy-to-Use Long Screenshot Applications and we are always open to your problems, questions, and suggestions, so feel free to Comment on us by filling this.
This is a free service that we offer, We read every message we receive. Tell those we helped by sharing our posts with a friend

Pradeep Sharma is a author the mind behind Techjustify, where I craft insightful blogs on technology, digital tools, gaming, AI, and beyond. With years of experience in digital marketing and a passion for tech innovation, I aim to simplify complex topics for readers worldwide.
My mission is to empower individuals with practical knowledge and up-to-date insights, helping them make informed decisions in the ever-evolving digital landscape.