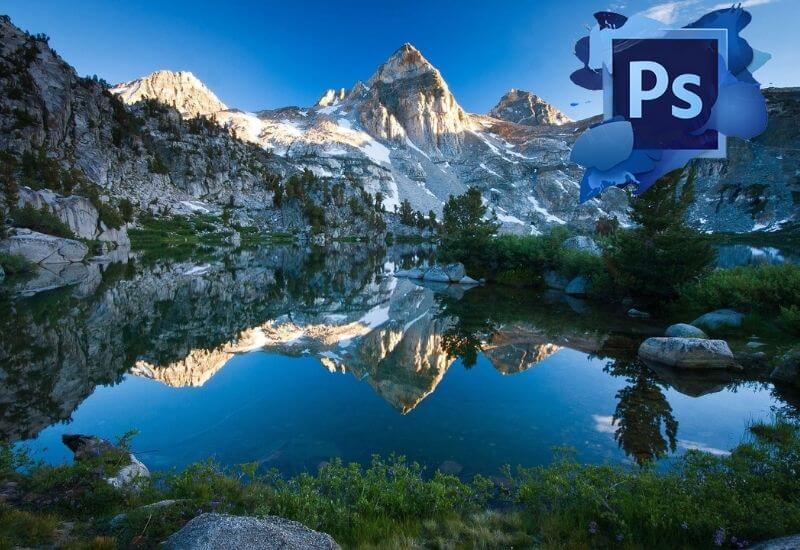
As you well know, you can create images or retouch photographs and create a reflection or mirror in Photoshop that we have taken, so that they adapt exactly to the final result that we expect.
It is much more likely to feel satisfied with a photo album that we will place somewhere in the house or treasure in memory. Of course, to get to that point, it is necessary to do some retouching, such as the reflection in Photoshop.
Knowing how to create a reflection or mirror in Photoshop is one of the most interesting techniques in this program if you want to give your photos a different touch.
But, in addition, it is one of the most common tasks for users. And in the following lines, we are going to teach you all the steps you have to follow to achieve it.
The fact is that photographic editing has attracted the attention of human beings since its inception, and over the last few years we have witnessed its extraordinary evolution
Which introduced elements such as the popular Lightroom presets, those development settings that worked like the current Instagram filters, since each one corresponded to a series of predetermined settings, allowing us to save a lot of time.
Table of Contents
The era of photo retouching
At present, it is true that we even have online portals that have been dedicated exclusively to this, as for example, we have the case of FixthePhoto, an example of professional photographic retouching services
In which you have to upload your images, indicate the changes you want to enter and receive the edited photo.
That is to say, not only do we no longer need to have this advanced knowledge in Photoshop or Lightroom
But we do not even have to move from home to obtain professionally edited photographs, as our parents had to do every time they were laboriously going to develop them. and at the risk of being dissatisfied.
Change the background of your images with Photoshop reflection
It is obvious that to make create a reflection or mirror in Photoshop you will need to have Photoshop installed, but if you don’t have it yet, you can download Photoshop for free at this link.
And now we are sure that you will want to try your luck trying the retouching on your own to join this trend of image editing. Let’s see how you do with a tutorial of those basics.
For that, we are going to stop at the so-called Photoshop reflection effect , which groups together various results but which, on this occasion, is especially interested in modifying or changing the background of your images .
Apply the reflection or mirror in Photoshop, an interesting alternative
Without a doubt, the reflection or mirror effect in Photoshop is one of the most interesting that you will be able to apply , one that will allow you to make an image look twice, generating that reflection or effect between the elements.
Apply reflection or mirror in Photoshop step by step
First of all, you have to change the size of the canvas, from Menu, Image, Canvas size, and expand the Height with Anchor according to image, so that you make sure that the images will not come off the canvas.
The next step is to duplicate a layer, which you can do in several ways, although the simplest is from Menu, Layer, Duplicate layer.
In addition, we advise you to assign a name so that you do not confuse them with each other.
Next, you have to take care of creating a silhouette with the Pen tool. You will do this by holding down the Caps Lock key to achieve a much more exact result when using the cross.
Once you have created the silhouette, you must go to Record path in the Paths panel, in the submenu of the panel. Later, you have to go to Make selection, OK, and then to Menu, Selection, Invert.
You must choose the duplicated layer within the Layers section, and Edit, Delete, before duplicating that layer.
The next step is to go to Menu, Edit, Transform, Flip vertical, moving down on the same layer, and going to Menu, Edit, Transform, Scale, distorting the layer until it looks like this.
In the Layers panel, you are going to Add vector mask, and in that mask you create a linear gradient, from white to black.
This, until it is again as we are teaching you, although you can play with your preferences.
Next, you have to create a new layer and fill with white from Edit, Fill, Background Color, White.
Finally, if you want, you can add a different background to both layers, to give it a different look.
When you’re done, save everything in the image format you like the most, and voila!
Conclusions
In short, we can say that nowadays it is easy to resort to solutions such as Lightroom or Photoshop to edit our photos, trying our luck to see if we are able to give it that special touch.
If you do not succeed, you have the possibility of contacting these platforms, which solve everything in seconds. Therefore, there is no real reason to display a photo in your home that you are not satisfied with.
We are always open to your problems, questions, and suggestions, so feel free to Comment on us by filling this. This is a free service that we offer, We read every message we receive.
Tell those we helped by sharing our posts with friends or just liking to Follow us on Instagram, Twitter and join our Facebook Page or contact us on Gmail, Linkedin, etc

Lokesh Sharma is a digital marketer and SEO expert at TechJustify with a keen interest in emerging technology trends including AI, cybersecurity, and digital marketing tools for more than 5 years. He writes clear, actionable articles for tech enthusiasts and business leaders, simplifying complex topics like VPNs, automation, and generative AI.