How to install linux in VirtualBox on Windows PC – You are passionate about the world of computer security and, after reading a lot of themed material, you have decided to start experimenting with one of the most suitable Linux distributions for this purpose: Kali Linux. Not having much practice with the “penguin” operating system.
However, you would like to avoid – at least for the moment – installing it on your computer, in order to avoid damaging your data and the operating system you have used so far.
You have therefore thought of contacting a virtual machine manager and creating a “virtual PC” on which to install Kali Linux without affecting the “real” system of your PC: more specifically,
You have discovered that VirtualBox is one of the best software of this type , as it is free and compatible with all the most popular desktop platforms (Windows, macOS and Linux), so you would like to learn how to use it.
How do you say? That’s exactly how things are and, therefore, would you like to know if I can help you find out how to install Kali Linux on VirtualBox? Yes, of course!
On the contrary, let’s immediately ban the chatter and let’s start: by reading the guide that I am about to offer you, in a few minutes you will have acquired all the necessary skills to brilliantly achieve the goal you have set for yourself. Let it bet?
Table of Contents
How to Install Linux in Virtualbox
If you have not yet installed VirtualBox on your computer, you can remedy this by connecting to its website and clicking on the Downloads item which resides in the left sidebar. Later, if you use a PC with a Windows operating system
Click on the Windows Hosts link , wait for the software installation package to be downloaded to your computer and, when the download is complete, start it.
Now, to install the program, click on the Next button three consecutive times and, aware that this operation will result in the temporary deactivation (it will last a few seconds) of all active connections, click on the Yes, Install, Yes and then Finish buttons, to conclude set up and start the software.
If you use a Mac, on the other hand, after connecting to the VirtualBox download page, click on the OS X hosts link, wait for the program .dmg package to be completely downloaded to your computer, and then start it.
Subsequently, double-click on the VirtualBox.pkg package contained in the window that opens, click on the Continue button twice in a row, then on Install and, when prompted, enter the Mac administration password in the appropriate field and click on the Install button software.
Security Preferences
Now, click on the button Open the Security preferences, press on the padlock symbol at the bottom left and re-enter the Mac password, so that you can make changes to the settings; once authenticated, click on the Allow button next to the wording.
The system software has been blocked from loading by the developer “Oracle America, Inc”, close the System Preferences and click on the Close and Move buttons to complete the setup.
Finally, start the program by calling it from the Launchpad or from the Applications folder of the Mac.
If you find it difficult to complete the installation of VirtualBox, I refer you to reading the tutorial that I dedicated to the subject, in which I have explained the previous steps in even more detail.
How to install Kali Linux on VirtualBox
At the time of writing this guide, it is possible to install Kali Linux on VirtualBox in two different ways: by carrying out an installation “from scratch”, ie
By following all the steps necessary for the configuration and installation of the various components of the operating system (exactly as if you were working on a physical disk); or using a ready-made virtual machine , which can be imported into VirtualBox in just a few clicks.
Although this last mode of action is faster and, in some ways, even simpler, it “hides” all the steps preceding the execution of the operating system; furthermore, the virtual applications of Kali Linux may not always be updated to the latest version of the operating system.
So, if you intend to test with VirtualBox in view of a future installation of Kali Linux on your computer, I strongly advise you to opt for the installation procedure from scratch. Depending on the method of action of your interest, you will need to download a different installation file.
Installation from scratch –
In this case, you need the ISO image of the operating system (the same one you can use to install Kali Linux on a computer, so to speak). To download it, connect to this website and click on the link Kali Linux 64-Bit (Installer),
If you want to install the 64-bit version, or Kali Linux 32-Bit (Installer) if, instead, you prefer to install Kali Linux 32-bit.
Ready made virtual machine
in this case, you need to download the Kali Linux virtual application, in OVA format. To access this website, click on the Kali Linux Virtualbox Images box, and then on the link that best suits the type of operating system you have (64 or 32 bit).
Once the necessary files have been downloaded (they are very large and may take some time), you are ready to install Kali Linux on VirtualBox.
Installing Kali Linux from scratch
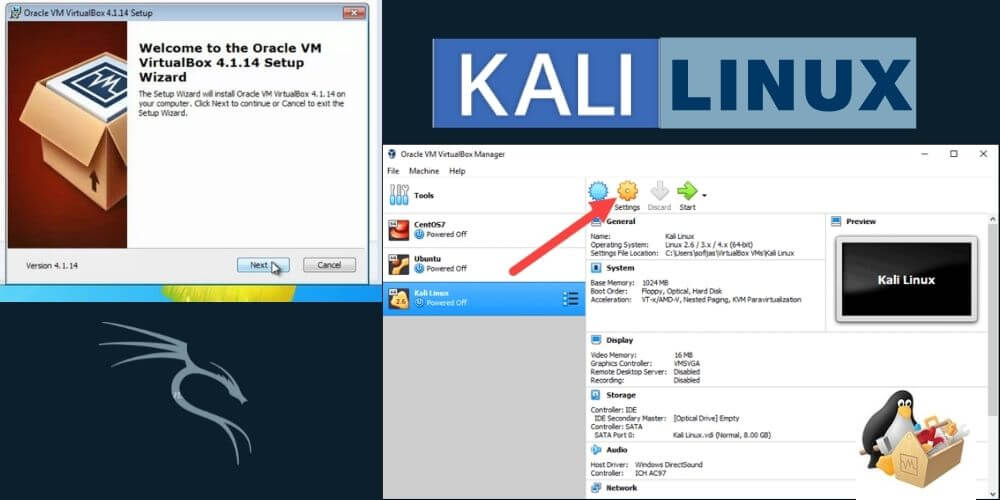
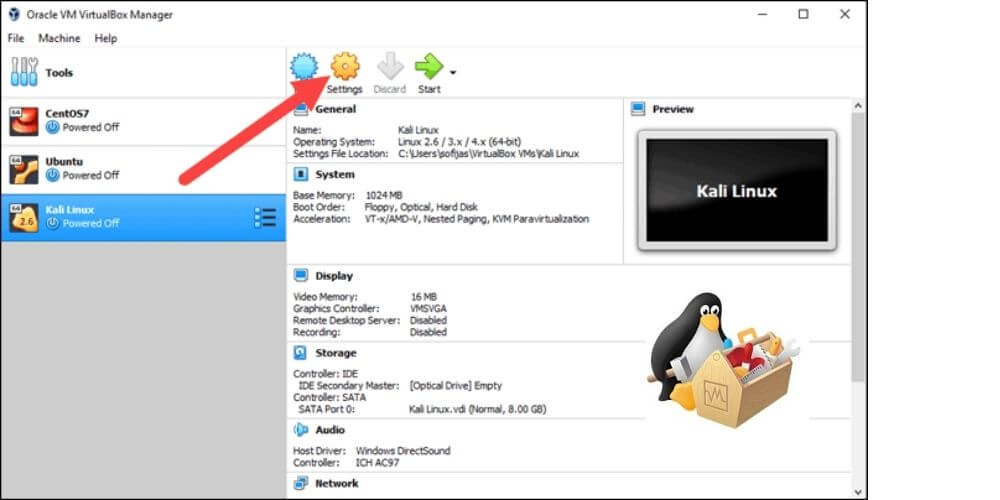
If you have opted for installing Kali Linux from scratch, you must first create a new virtual machine capable of hosting the operating system.
Therefore, click on the New button located in the VirtualBox window, type Kali Linux in the name field and make sure that the Type and Version drop-down menus are set, respectively, to Linux and Debian (64-bit) (or Debian (32-bit), if you downloaded the 32-bit OS ISO).
Read Also : How to speed up your PC: slow computer/laptop what to do?
Now, click on the Next button and, using the displayed adjustment bar, set the amount of RAM to dedicate to the virtual machine; Note that Kali Linux can run smoothly on machines with 2GB (2048MB) of RAM,
Which you can increase for better performance. Be sure, however, never to set a virtual RAM value that is more than half the RAM actually installed on your computer.
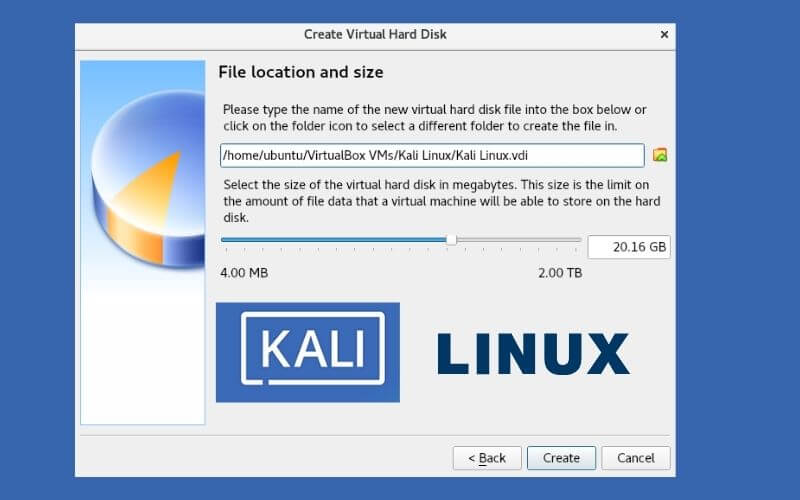
Create Virtual Hard Disk
After this step too, click on the Next button, put the checkmark next to the item Create a new virtual hard disk immediately (if not already there), and press the Create button to create a new virtual hard disk;
Now, click on the Next button twice in a row, use the adjustment bar and/or the box next to it to specify the size of the disk (which should be at least 8 GB) and click on the Create button to finish creating the virtual machine.
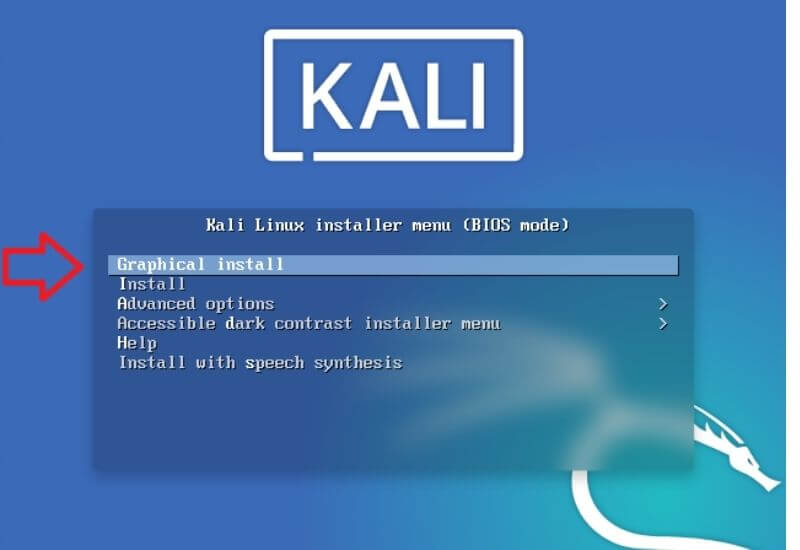
Finally, here we are: to start the installation of Kali Linux, double-click on the name of the virtual machine you just created, in order to start it, then press the button in the shape of a yellow folder with the arrow.
Click on the Add button attached to the next screen and, using the File Explorer / Finder screen, select the Kali Linux ISO downloaded earlier. Now, click on its name and press the Choose and Start buttons, to start the virtual machine.
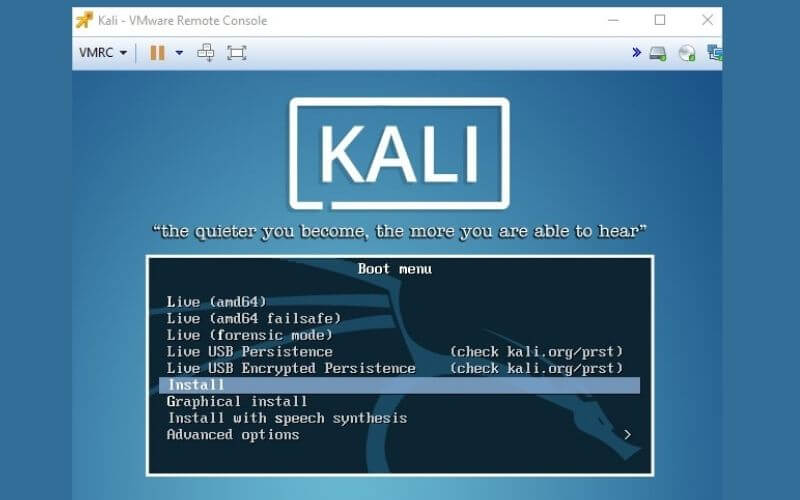
Now click inside the VirtualBox screen, to make Kali Linux acquire the mouse and keyboard (you can release them at any time, by pressing the right ctrl key on the keyboard on Windows or the right cmd key on macOS), select the item Graphical Install and hit the Enter key on your keyboard.
Components to install kali Linux
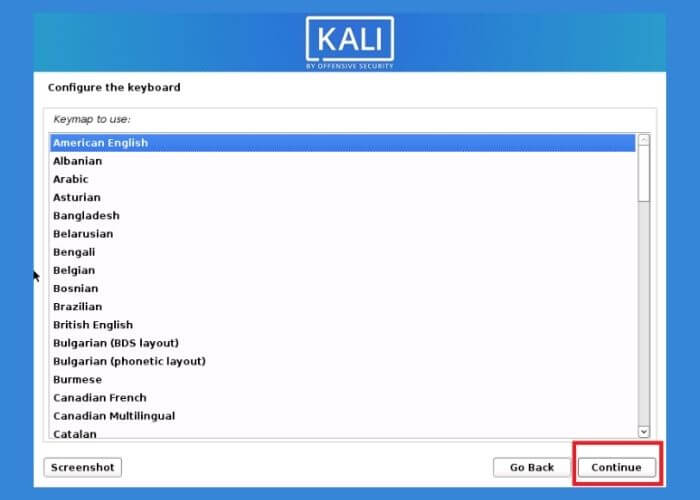
Subsequently, select American English from the list of available languages, click on the Continue button, choose the American option again from those proposed and click on the Continue button.
Now, select the keyboard mapping you have, press Continue again, and wait for Kali Linux to recognize the virtual disk and load the components needed to run the installer. At this stage, the operating system should be able to connect to the Internet.
Subsequently, if you deem it appropriate, change the hostname suggested by the system, click on the Continue button twice consecutively and proceed with the configuration of the main user account:
Type the full name in the box proposed on the screen, click on the Continue button and in the same way, define the username and password to be used to log in to the system (you have to type it twice).
After this step too, you have to configure the disk partitioning modes: since you are using a virtual disk, entirely dedicated to Kali Linux, select the Wizard item – use the entire disk.
Click on the Continue button four consecutive times, put the checkmark next to Yes and, finally, click on the Continue button.
Finally, here we are! If everything went smoothly, the actual installation of the operating system should start, which, depending on the performance you have reserved for the machine, could take a few minutes.
To configure the Internet sources for updates and future package installations, press the Continue button twice in a row.
Installed Kali Linux
As the last step, you will be prompted to install the boot loader, that is the program that allows you to start Kali Linux (or to select the operating system to use, in case of dual-boot configurations): to proceed.
But the sign tick next to Yes, press the Continue button, select the virtual hard disk on which you have previously installed Kali Linux and press the Continue button again.
The installation is complete! Click on the Continue button for the last time and wait for the virtual machine to restart automatically: on the next boot, you should find yourself in front of the Kali Linux login screen.
To log into the operating system, type the username and password specified above, each followed by pressing the Enter key .
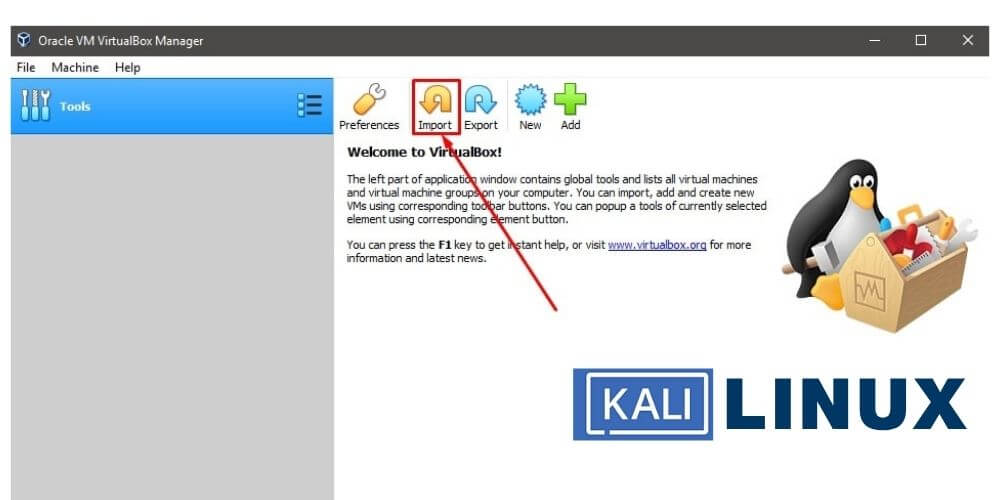
Kali Linux Virtual Machine import
If you prefer to avoid the complete installation procedure of Kali Linux and prefer to use a ready-made virtual machine, do this: open the VirtualBox File menu (top left), select the Import virtual application item.
Click on the yellow folder symbol placed next to the File text box, select the previously downloaded OVA file and click on the button, located at the bottom right. Finally, click on the Import and Accept buttons and that’s it!
At this point, double-click on the newly created virtual machine, in order to start it, and wait for Kali Linux to start completely; once in the login screen, type the username kali, followed by pressing the Enter key, and repeat the operation with the password kali.
How to use Kali Linux
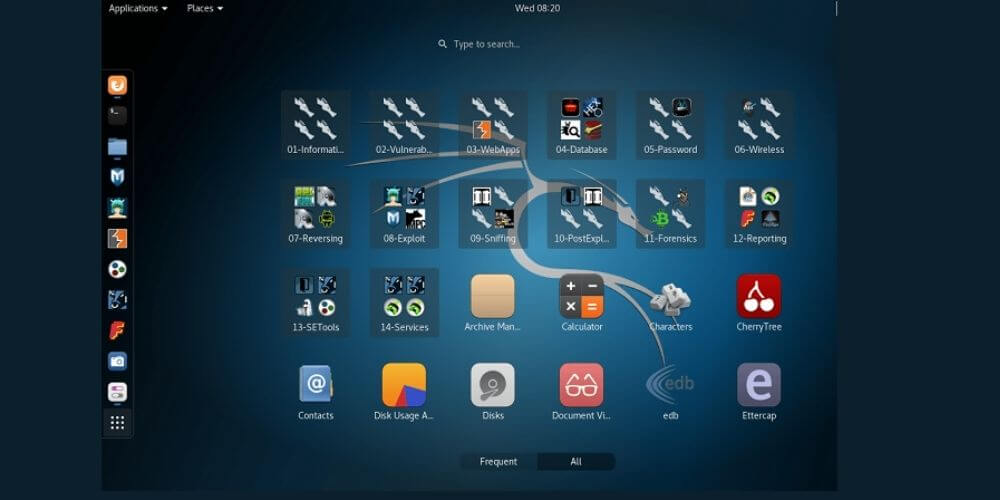
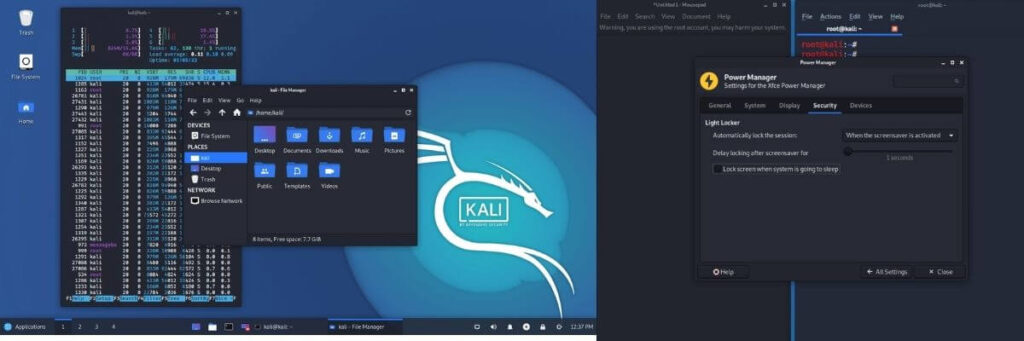
Once logged into Kali Linux for the first time, you can use the operating system like any other Linux distribution. Since this is an operating system mainly dedicated to penetration testing, there are numerous tools dedicated to the analysis of Wi-Fi networks and their security available within it.
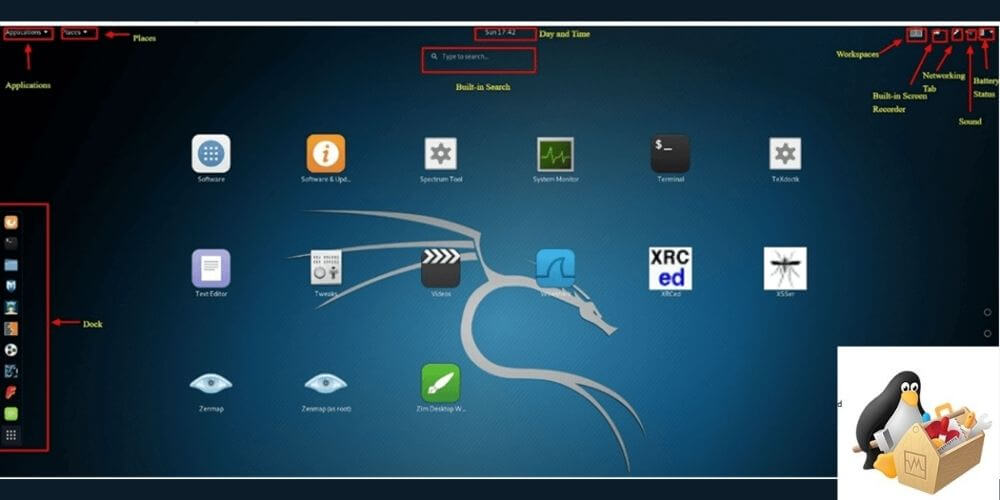
All the tools in the distribution can be called up by accessing the Kali menu, located in the lower-left corner of the screen; to access the system settings, on the other hand, you have to click on the regulator’s icon, located near the clock, at the bottom right.
For more information, I invite you to read the in-depth guide that I have dedicated to this operating system: please, take a look at it at least!
We are always open to your problems, questions, and suggestions, so feel free to Comment on us by filling this. This is a free service that we offer, We read every message we receive. Tell those we helped by sharing our posts with friends or just liking to Follow us on Instagram, Twitter and join our Facebook Page or contact us on Gmail, Linkedin, etc

Pradeep Sharma is a author the mind behind Techjustify, where I craft insightful blogs on technology, digital tools, gaming, AI, and beyond. With years of experience in digital marketing and a passion for tech innovation, I aim to simplify complex topics for readers worldwide.
My mission is to empower individuals with practical knowledge and up-to-date insights, helping them make informed decisions in the ever-evolving digital landscape.