How to Remove the Background in Canva – Canva is an excellent tool for designing any logo for business purposes, a new youtube channel, or personal use. Canva offers its users hundreds of new and unique tools and options to apply and create a new design.
Among all the available options in Canva, one of them is background removal. Most times, some photos are worth admiring, but people’s eyes get distracted due to unavoidable backgrounds. And that’s where the background removing tool comes in handy for users.
The article will break down the steps of how you can use Canva to remove the background of any picture easily. Read further to know the background removal tool works on a photo.
Table of Contents
How To Remove The Background In Canva?
To keep your photos occupied with Canvas background removal service, you only have to follow several easy steps. And in this section, we’ve demonstrated the Background removal process of a photo through Canva easy going so the beginner can also depend on it.
Here’re the steps you’ll need to follow to remove background from an image in Canva.
Step 1: Uploading Photo
To start the background removal process, you have to first open Canva. Now when the window displays the canva surface, find the media upload option and select the photo; you will remove the background from the library or your internal memory.
Click on the upload option to import the media into Canva.
Step 2: Selecting Tool
When you’re done uploading the photo, now it’s time to select the editing tool. You’ll find the edit image option on the top toolbar.
And there’s an option called BG Remover or Background Remover on the panel appearing on the left side.
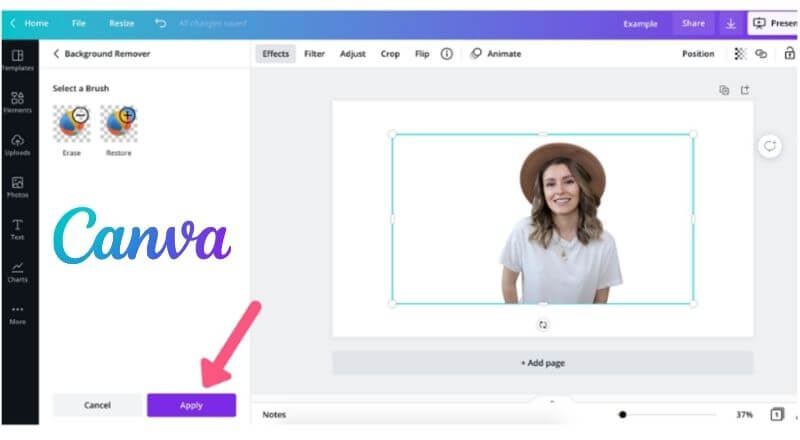
Step 3: Selecting Area
After selecting the BG Removal option, it’s time to work with the tool on the picture you uploaded earlier.
To apply the tool, select the subject and mark them so that when you click the apply option, only the chosen area remains on the screen, and the rest vanishes.
Be careful while selecting the area so that you don’t mark on the subject or any necessary part.
Step 4: Applying The Tool
If you’re done with selecting the area and ready to go, then just click on the apply button and wait for a bit. After a bit, you’ll see the result on the screen. The tool will make the area outside the selected portion disappear.
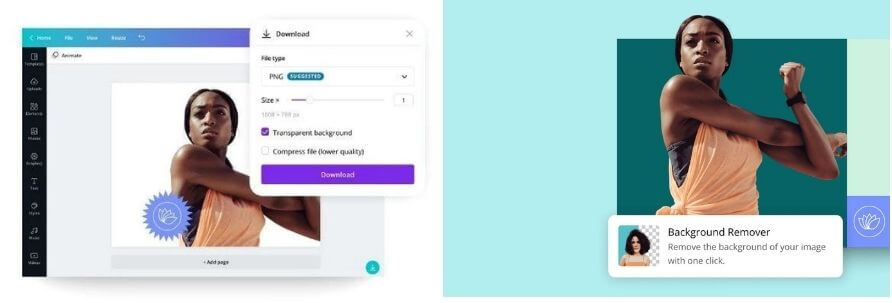
These four simple steps are enough to help you reach the goal of removing background from a photo. By removing the background of a picture, you can use the subject as a part of one of the logos or designs you are working on.
The Background Remover tool also offers a restore option to regain the portion you removed if you want.
Conclusion
Once you are comfortable using the background removal tool on pictures, you will find many ideas and ways to do experiments and see the magic the tool does on a photo. You can do many eye-catchy edits using the BG removal tools and whatnot.
Read Also: Best 10 Free Background Remover Online Tools in 2022
The background removing tool lets you explore many options other than cropping the photo, adding filters to hide the distracting background, and many more. You can save and use many snaps that at first may seem unusable.
We hope now you’re well enlightened with how the BG removal works and removes the background from a photo in Canva.

Pradeep Sharma is a author the mind behind Techjustify, where I craft insightful blogs on technology, digital tools, gaming, AI, and beyond. With years of experience in digital marketing and a passion for tech innovation, I aim to simplify complex topics for readers worldwide.
My mission is to empower individuals with practical knowledge and up-to-date insights, helping them make informed decisions in the ever-evolving digital landscape.