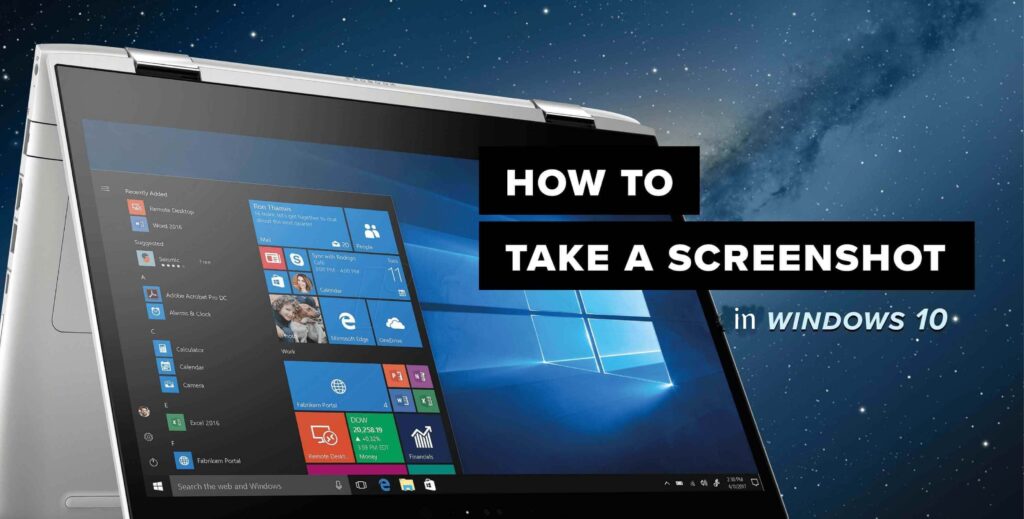
Do I know how to take a screenshot in Windows 10? Windows 10, Microsoft’s latest and most revolutionary operating system, which almost everyone has fallen in love with for its ease of use and performance, has been on the market for quite some time, though that hasn’t stopped us from learning small everyday tricks to be able to further compress this new software that millions of users have already installed on their devices in half the world.
Today and through this article, we will explain many tricks, so you can take a screenshot in Windows 10 . Most of you have a laid-back attitude when it comes to painting a picture about yourself, but today more suitable.
If you want to take a screenshot in Windows 10 and you already know how to do it or not, I recommend you pay close attention because today you will definitely learn new tricks, not only to take this screenshot you need but do it in the most appropriate way and touch it later.
Before we start explaining in detail how to take a screenshot in Windows 10, we must say that there are several methods, which we will explain one by one. Most of these methods apply to other versions of Windows, so if you have come so far as to learn how to take a screenshot, but still do not have the latest version of Windows, it certainly does matter, some of these methods are definitely will work for you without any problems.
Index finger
- Screenshot in Windows 10 using the keyboard
- Screenshot in Win 10 with print screen
- Screenshot Windows 10 on a window
- Screenshot in Windows 10 with the “Snipping” program
- You do not always have to edit with Paint
Table of Contents
Screenshot in Windows 10 using the keyboard
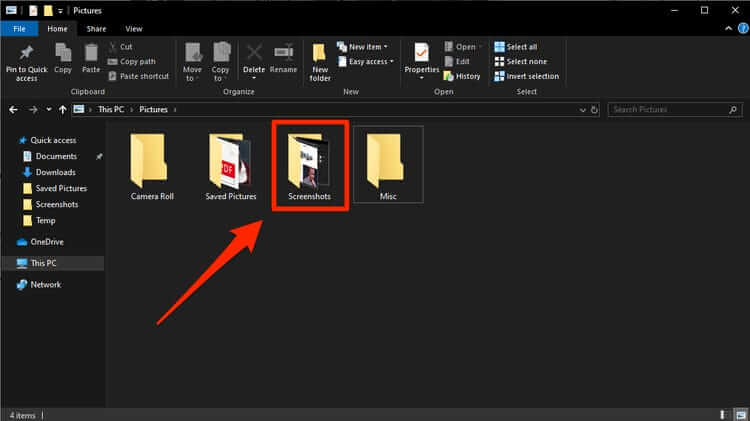
One of the great innovations of Windows 10 is the ability to take a screenshot and that it is automatically saved in a folder called “Screenshots” , it is able to find it in the “Pictures” folder.
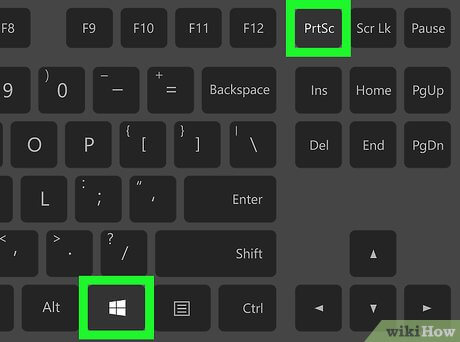
To be able to take a full screen using this method, we must simultaneously press the Windows + PrtScr keys. Then we will see a white screenshot and the download will already be available in the folder we have indicated.
Screenshot in Window 10 with print screen
This method is usually the most used by most users, due to ignorance of other methods, as it is the one that will take the most time and work to take a screenshot, in Windows 10 and any other version of Windows.
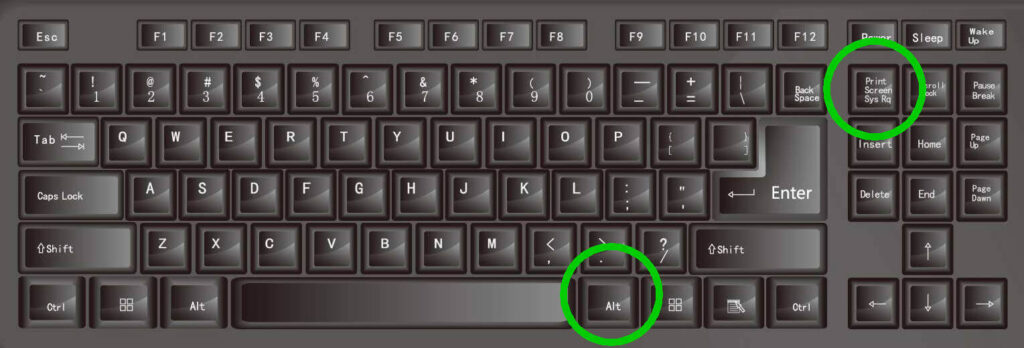
Catch in this case This is done by pressing the “Print Screen” key, which is usually located right next to the F12 key in most cases. . This key may also be called “Prt Scr” if your keyboard has English stickers.
Once this button is pressed, a screenshot will be taken and we must paste it in order to edit it or save it to an image editor. The simplest is Paint, which is already pre-installed on any version of Windows.
We just need to paste the image into any image editing program and then save it. If you want, you can cut it or edit it through any of the options offered by the program we have used.
Screenshot in Windows 10 and Laptop
If what we want is to capture a specific window in Windows 10 and not the entire screen, which inevitably makes us cut it later, we can always capture this particular window in a fairly simple and fast way.
For this it will be enough to press the key combination Alt + Print Screen . This will take the window that we have activated at that time and we should paste this screenshot only in Paint or another image editor.
Screenshot in Windows 10 and Laptop with “Snipping”
Although all the methods we have seen are quite simple and allow us to take a screenshot fairly quickly, we will offer you a new screenshot capability.
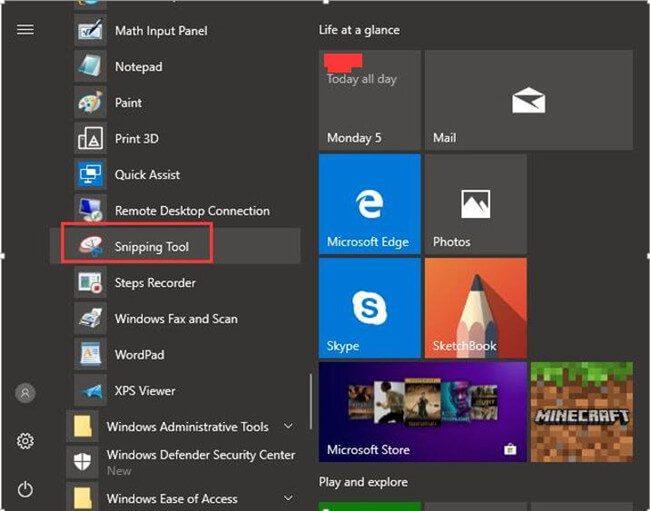
Via Snipping Application Natively Installed in Windows 10 We can capture a screenshot in a more or less simple way. To access this program we can use the search engine found in the new Microsoft operating system, in the taskbar and right next to the Start menu.
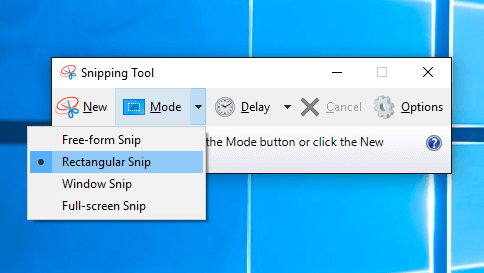
Once the program starts, we will be able to take the screenshot, be able to select exactly what we want to record, which is an advantage, although it is something we can also do with any of the previous methods, the which are undoubtedly much faster.
“Cuttings” is a simple program that allows us to do a few things, but all this is quite interesting if what we want is to make a screenshot of something special, to name it somehow.
You do not always have to edit with Paint
To close this article, we do not want to miss the opportunity to tell you that you do not have to use Paint to draw and edit any screenshot we take. And there are many users who are quite reluctant to use this program, which comes natively installed in Windows 10 and other versions of Windows, despite the fact that it is quite comfortable and easy to use.
If you want to edit the screenshot with another program, you can select what you need by opening it and pasting the screenshot into it. . If the recording is saved in the “Screenshots” folder, you just need to open it with the program you want from this location.
With all these methods we have offered you, we do not think you had a problem taking a screenshot, but if you did not, for whatever reason, you can tell us your questions or problems through the site intended for the comments of this post or through any of the social networks in which we are present. Once we have read your message, we will try to help you so that taking a screenshot in Windows 10 is not an impossible task for you.
If you want to stay up to date, follow us on Instagram, Twitter. If you want to receive support for any questions or problems, join our Facebook Group or contact us on Instagram, Gmail, Linkedin, etc

Pradeep Sharma is a author the mind behind Techjustify, where I craft insightful blogs on technology, digital tools, gaming, AI, and beyond. With years of experience in digital marketing and a passion for tech innovation, I aim to simplify complex topics for readers worldwide.
My mission is to empower individuals with practical knowledge and up-to-date insights, helping them make informed decisions in the ever-evolving digital landscape.