How to Install the Epson L3256 Printer – The printer is a computer companion device that functions to display data in printed form in the form of text or images.
For some people, a printer is needed especially those who work using a computer or laptop. There are definitely times when you will need a printer for various things such as text or image data.
Even though it looks easy, it turns out that there are also users who have difficulty connecting their PC or laptop to the printer.
For example, many people who buy a printer for the first time are confused about how to install it, who were confused about how to connect the printer to my PC / Laptop.
Table of Contents
What are the contents of the package for purchasing a new Epson L3256 printer?
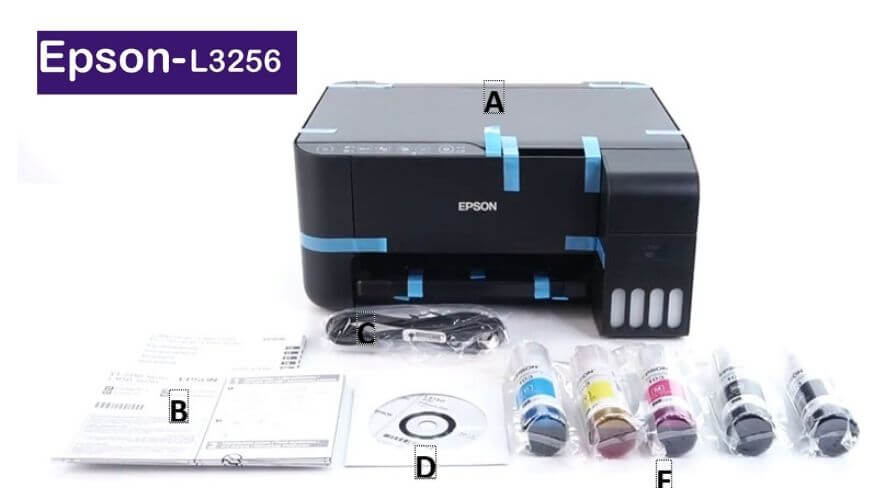
When you buy this Epson inktank L3256 printer, you will get the contents in it
A. Printer unit
B. User manual and warranty card
C. USB cable and power cable
D. Driver CD
E. 1 Pack of 4 ink (red, black, yellow, blue and 1 black spare)
Steps to Install the L3256 Printer
A common way to connect a printer to a PC / Laptop is to connect the USB cable from the printer directly to the PC / Laptop.
Usually, Windows will automatically detect the presence of new hardware and start the installation as soon as the USB is plugged into the Laptop / PC.
However, because this is a new printer, I followed the guide on how to install it, which was provided by the maker of this Epson L3256 printer.
If you do not understand, please follow the steps how to install it below:
- First open the printer box slowly so that the components inside are safe and remove all the components that are in the box.
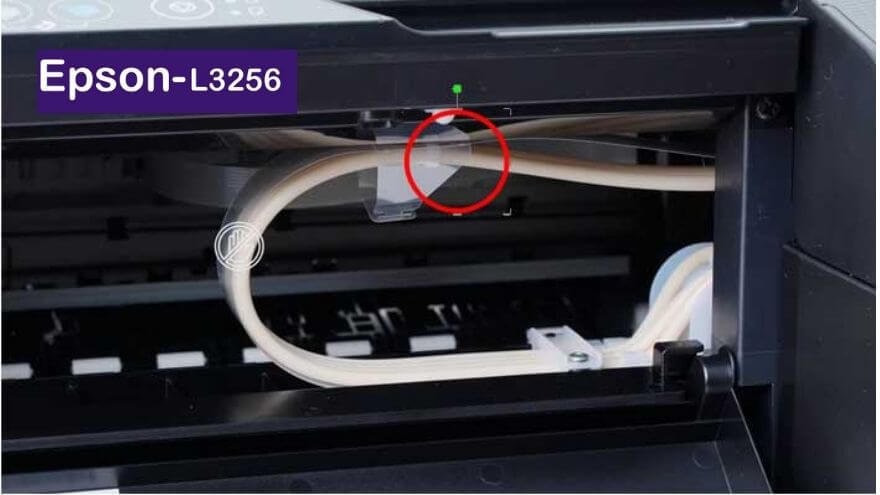
- First remove all the insulation that binds at several points of the printer.
- For the ink hose, try not to touch it / detach it.
- Start filling all the ink into the tank on the printer.
The guide on how to refill ink for the first time in this new Epson L3256 printer, namely
- Open the ink tank cover
- Take any color ink
- Turn the cap to the left and remove the ink bottle cap
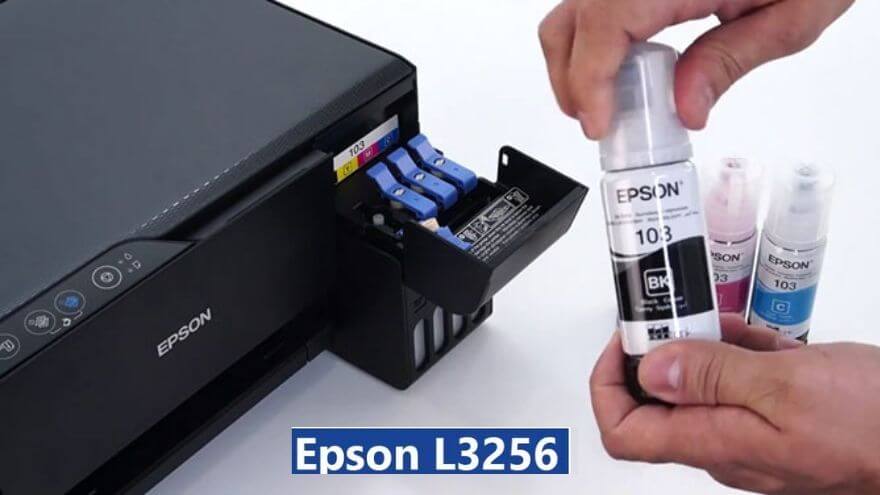
- Pour ink up to the specified parameters. This time I filled it up to the 3rd line. Do it repeatedly until all the ink colors are filled.
- Reclose all the printer ink filling holes, then also close the top of the printer ink tank.
- Connect the printer power cable to your electrical outlet
- Turn on the printer by pressing the power button and wait until the light stops flashing
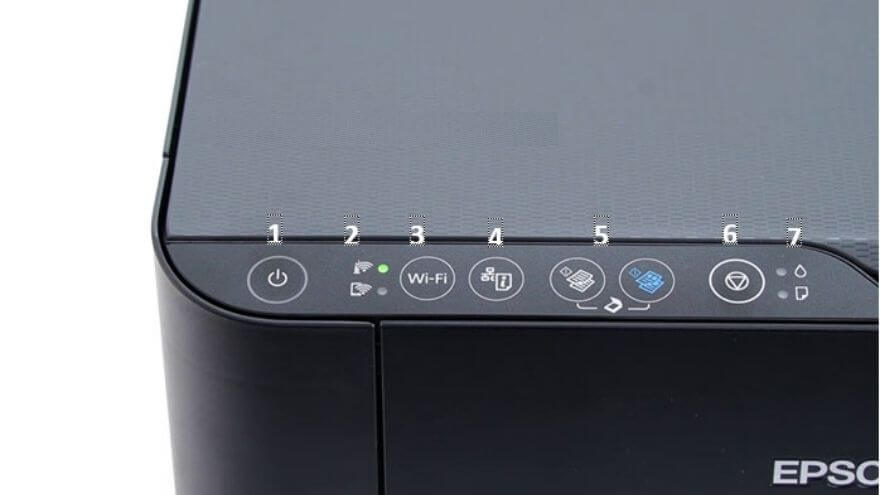
Information on the function of the buttons on the Epson L3256 printer
- Power Button
- wifi indicator
- Tombol Connect wifi
- Wifi Info Button
- Copy button (Black & White & Color)
- Charging button
- Ink & paper indicators
- Fill in the printer ink by pressing the down arrow button for 5 seconds and wait a moment.
From the information in the manual as well as some experience when carrying out the ink management process, the first time you enter the ink will take about 20 minutes, don’t turn off the printer here.
The signs that charging is complete are if the indicator light has stopped lit, here you have completed preparations for using the printer on the unit
The process of installing the program /Install software or L3256 printer driver to a PC/Laptop
To be able to use the printer for printing first, it’s a good idea to install the software so that all the facilities owned by the printer can be fully used. Here’s a guide to do it..
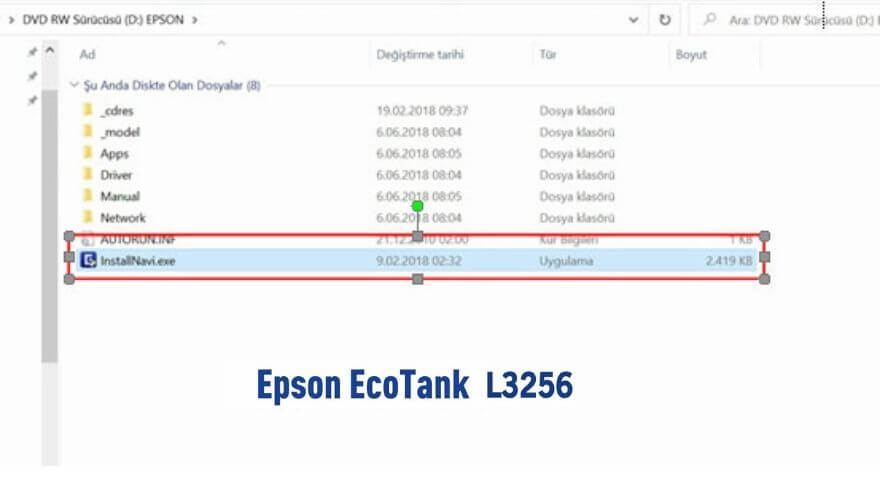
- Insert Driver CD
- Your PC/Laptop will Read and open
- Then click InstallNavi .
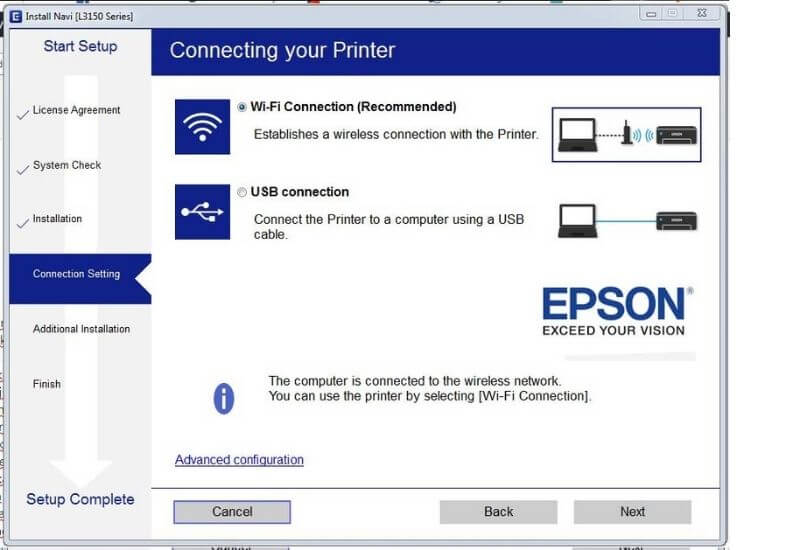
- Then click next next,
- Wait a few Minutes till the installation is complete.
- In the middle of the driver installation, you will be asked to connect the USB cable on the printer to your PC / Laptop.
- If the installation is correct, in the lower right corner you will see the Epson printer driver with the status online or ready.
How to Connect Device with Wifi(direct) Printer
This Epson printer series is equipped with the WIFI direct feature, for those of you who don’t know the explanation about wifi direct, see the Wifi Direct explanation article
- The first thing you need to do is press the wifi button until the light indicator is on
- Press simultaneously the “wifi” button and the “info” button hold down the button for 10 seconds then, after the indicator flashes let go
- Then the printer will print info from the printer unit, including the wifi info that has been set up from the maker. Then enter the password / password that has been listed.
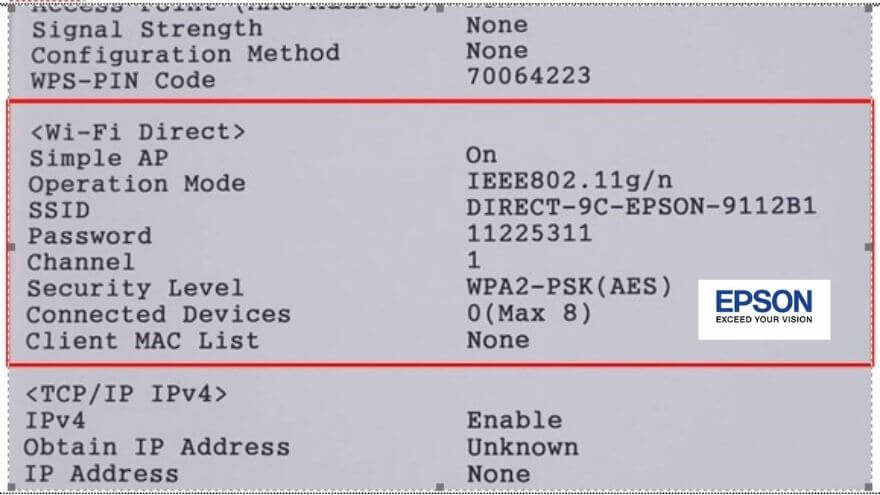
- Find the wifi name issued by the printer. Then connect by entering the password.
- At this point, your printer is already connected to your PC/Laptop, then please try to print any other printer functions from your computer.
That’s the guide on how to install the Epson L3256 Printer when it was first prepared after purchase, until the process of filling ink and being able to print and use other facilities

Pradeep Sharma is a author the mind behind Techjustify, where I craft insightful blogs on technology, digital tools, gaming, AI, and beyond. With years of experience in digital marketing and a passion for tech innovation, I aim to simplify complex topics for readers worldwide.
My mission is to empower individuals with practical knowledge and up-to-date insights, helping them make informed decisions in the ever-evolving digital landscape.