How to take screenshots on laptops and PCs – Capturing the screen on a PC is a very useful trick for many purposes. Good for work purposes, academic purposes, and other purposes.
Unfortunately, there are still many who don’t know how to screenshot on this laptop and PC .
To take screenshots using a laptop or PC, you can use various methods and tools. Both the built-in tools of a laptop or PC as well as the default tools of some editing software.
Well, therefore on this occasion we will discuss this matter in full and in detail. Want to know how?
Check out the full review on how to screenshot on a Windows 7, 8, 10 PC or laptop below.
- Ways to take screenshots on laptops and PCs
- 1. Using the Snipping Tool
- 2. Using Printscreen
- 3. Using Alt + Printscreen
- 4. Using Key + Shift + S
- 5. Using Lightshot Software
- 6. Using Photoscape
Table of Contents
6 Ways to take screenshots on laptops and PCs
1. Using the Snipping Tool
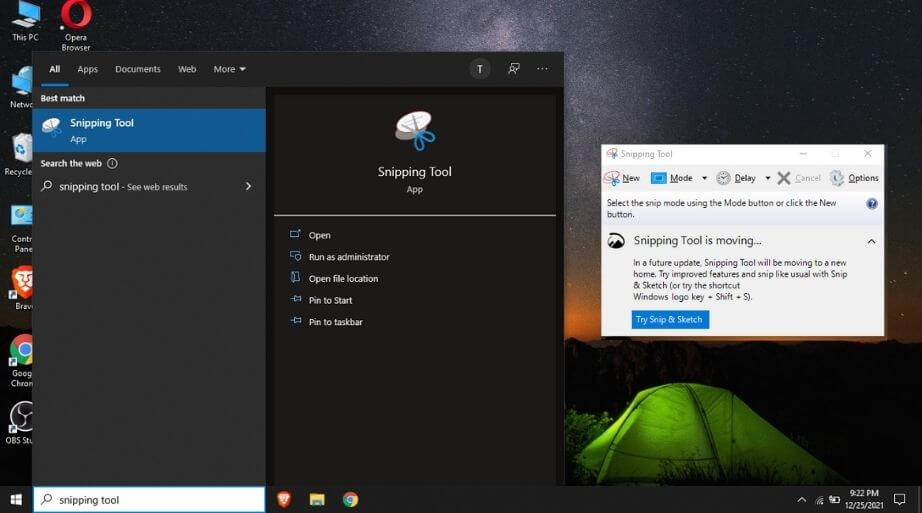
Snipping Tool is Windows default software that is commonly used to capture screens on laptops and PCs.
This software has its own advantages because, in addition to being easy to use, it can also give users freedom in selecting the screen to be a screenshot.
Here’s how to capture the screen using the Snipping Tool:
- Open the Snipping Tool application. If you don’t see it on your desktop, just search for it using the Windows search feature
- Make sure the screen you want to screenshot is actively appearing on your laptop or PC screen
- After the application opens, click New at the top left
- Here the application will be minimized and you can take screenshots from here
- Drag the cursor until the part you want to screenshot is all selected
- Once selected, release the drag on the mouse
- After that the image will be automatically saved in the Snipping Tool application
- In this application, you can directly save the screenshot or you can also do a little editing process.
2. Using Printscreen
The next way to screenshot on Laptops and PCs is to use the PrintScreen button.
Normally, this button will always be on the keyboard of laptop and PC users. For the screenshot itself, follow these steps:
- First, make sure the page to be screenshot is currently showing on your laptop or PC screen
- Press the printscreen button in the right corner of the keyboard. After this, nothing will happen. Don’t worry because the screenshot has been successful and is already saved on the clipboard. The next step you just need to paste it in another application
- Then open the editing application. The easiest option is you can use paint
- Because the previous screenshot is saved in the clipboard, you can paste it on the Paint page by ctrl + V or right click paste
- Before saving, you can first edit the screenshot or you can save it directly
Taking screenshots using this PrintScreen button may seem simpler, but this method has a weakness.
That is, you can’t capture a specific group of screens but can only capture the entire screen.
To be able to take certain parts, then you have to do the cropping yourself using other editing applications.
3. Using Alt + Printscreen
If you only use a print screen, it will give less than optimal results. Then you can try it by adding the Alt key when screenshot using Print Screen. The method is below:
- Make sure the screen you want to screenshot is active
- Press printscreen and Alt key at the same time
- From here the screenshot will be saved on the clipboard, you are free to paste it in any editor
- Open editing media such as Paint, or you can also use other applications
- Press Ctrl + V or right click and select paste to paste the screenshot earlier
- Save the result by clicking save
- You can also edit it first if you feel the screenshot is not good
Adding Alt will take a screenshot of the active window only. The toolbar at the bottom will not be included.
4. Using Key + Shift + S
In the latest Windows 10, there is a screenshot feature that is arguably better than the previous methods.
Namely by pressing the key + shift + s. Keep in mind that this feature is only available in the new version of Windows 10. Here are the steps:
- Press Key + Shift + S simultaneously
- The laptop screen will automatically dim as a sign that you are entering screenshot mode on the screen
- Then the cursor will change immediately, this is where you can select the part of the screen to be screenshot
- After that, you can open the editor application, and start pasting the screenshot.
5. Using Lightshot Software
If previously we used the built-in features, now we will use third-party software. How to screenshot on laptops and PCs below will use a software called LightShot.
LightShot is an application that offers a lot of functionality for taking screenshots.
This application is suitable for screenshots that require significant editing. Here are the steps:
- Download and install the LightShot application
- LightShot will appear on the toolbar window once the installation process is complete
- To use this application, just activate it from the toolbar
- When active, LightShot will automatically take over the printscreen function on the keyboard
- To use it, click printscreen on the keyboard
- Then hover and drag from the corner until all the screens you want to screenshot are captured
- You can save or edit the screenshots first.
LightShot has many supporting features to beautify your screenshots.
You can edit screenshots such as adding information in the form of shapes and text via LightShot. Of course, you can also skip this step and just save it right away.
You can also directly share screenshots with other people using this software. Of course, you also have to be connected to the internet.
6. Using Photoscape
How to screenshot on laptops and PCs this time we will use Photoscape. Basically, Photoscape is a photo editor application that focuses on manipulating photo objects.
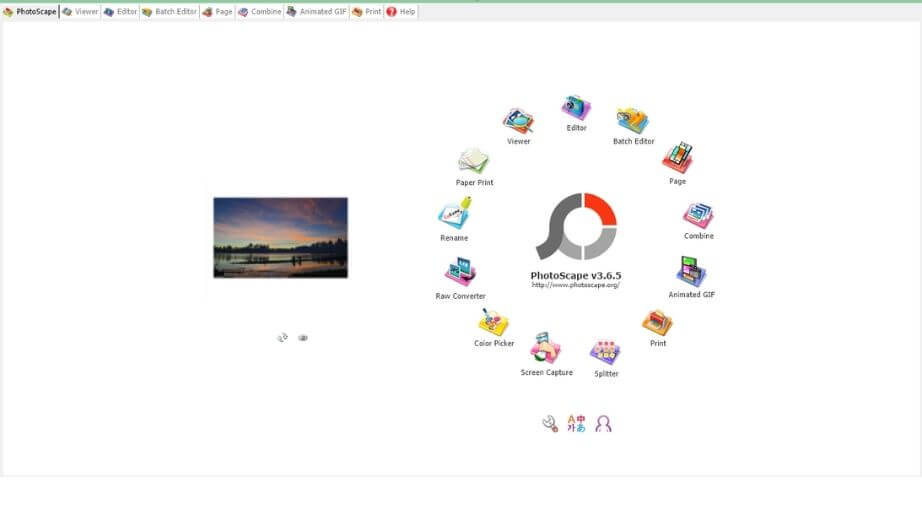
However, there is one screenshot feature that you can use for this purpose.
Here’s how to take a screenshot using the Photoscape software.
- Download and install the Photoscape application on your laptop or PC
- After the installation process is complete, open the Photoscape application
- Make sure the screen to be screenshot is active and showing
- Click the screen capture icon or screenshot in the Photoscape app
- After that, choose one of the three options, namely capture the entire screen, capture only part of the screen, or capture the last screenshot
- After selecting, the screenshot results will immediately appear in the application
- Then you can directly save or edit the screenshots first.
Taking screenshots using Photoscape is not as simple as using the default application. However, the features provided are a bit more complete and give you a choice of modes in screenshots.
Don’t forget that Photoscape is a photo editor software. So you can manipulate the screenshots by taking full advantage of the features this software has.
Conclusion
Those are 6 ways to screenshot on a laptop or PC, either by using the default system or additional software.
We are always open to your problems, questions, and suggestions, so feel free to Comment on us by filling this. This is a free service that we offer, We read every message we receive.
Tell those we helped by sharing our posts with friends or just liking to Follow us on Instagram, Twitter and join our Facebook Page or contact us Gmail, Linkedin, etc

Pradeep Sharma is a author the mind behind Techjustify, where I craft insightful blogs on technology, digital tools, gaming, AI, and beyond. With years of experience in digital marketing and a passion for tech innovation, I aim to simplify complex topics for readers worldwide.
My mission is to empower individuals with practical knowledge and up-to-date insights, helping them make informed decisions in the ever-evolving digital landscape.