How to enable or disable keyboard autocorrect: typing settings – The smartphone’s autocorrect is quite a useful tool when writing in the chat, as it automatically corrects certain spelling errors.
However, it can sometimes be somewhat annoying, as it tends to replace unfamiliar words or terms , making it necessary to rewrite the message.
Luckily, it can be disabled to avoid this type of cell phone problem.
That is why, in the following article, we explain how to deactivate autocorrect on mobile , in some of the most popular applications for Android.
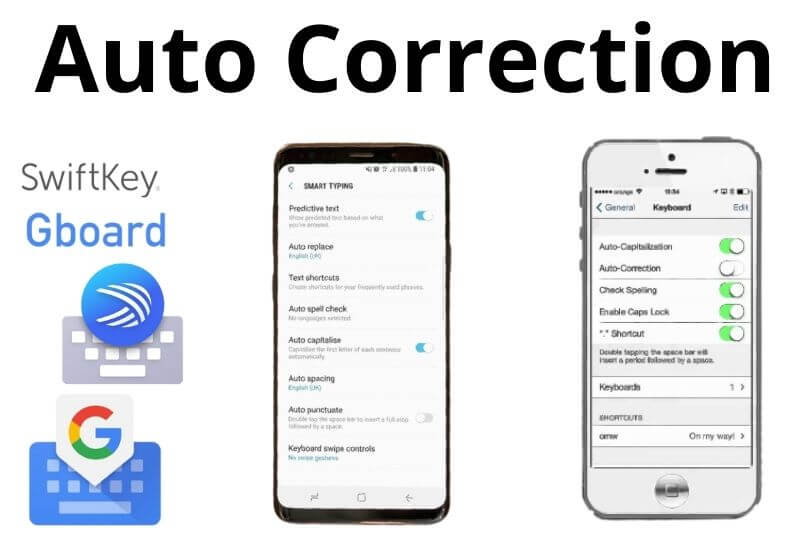
These are the Gboard (Google Keyboard) and SwiftKey, in addition, it shows how to disable this function in Samsung and Huawei Smartphones,
Which incorporate their own keyboard in their system. It is worth mentioning that, in any of the cases, the procedure to follow is basically the same.
- Turns the dictionary function on and off
- Of the system
- From Gboard (Google Keyboard)
- SwiftKey
- Huawei Smartphones
- On Samsung Smartphones
- Add or remove words in your personal dictionary
- Other keyboard configurations
Table of Contents
Turns the dictionary function on and off
Activating or deactivating the automatic correction function on the mobile is very simple, as it is possible to do it from the keyboard itself (Gboard and SwiftKey) or using the phone’s settings menu .
Now, in the case of Samsung or Huawei cell phones, turning on and off the Swipe Keyboard autocorrect is also possible and simple to achieve.
Of the system
Every Android Smartphone brings with it the autocorrect function, which can be deactivated from the equipment settings menu , following the instructions mentioned below .
It should be noted that the route to follow may vary slightly on each computer, depending on the model or version of the Operating System of the same.
- Go to ” Settings” .
- Swipe until you find ” System ” and click on it.
- Note : on some devices it may be in ” Advanced settings “.
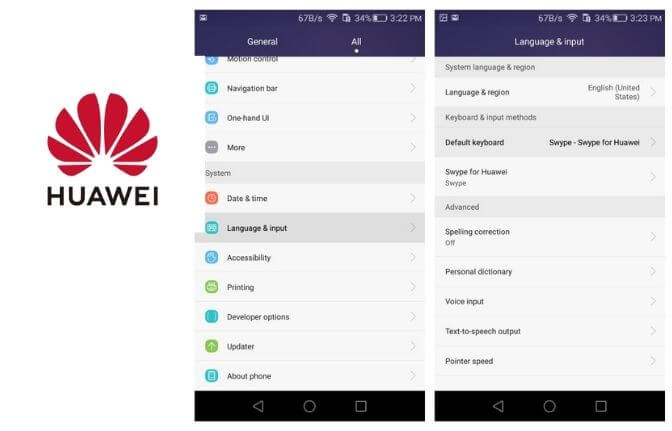
- Press ” Languages and input ” ( Language and text input
- Pull down the ” Advanced ” menu and select ” Spell checker .”
Finally, you must click on the lever to deactivate the Android autocorrect . In this way, the automatic checker will be disabled and will stop replacing words or terms as you type.
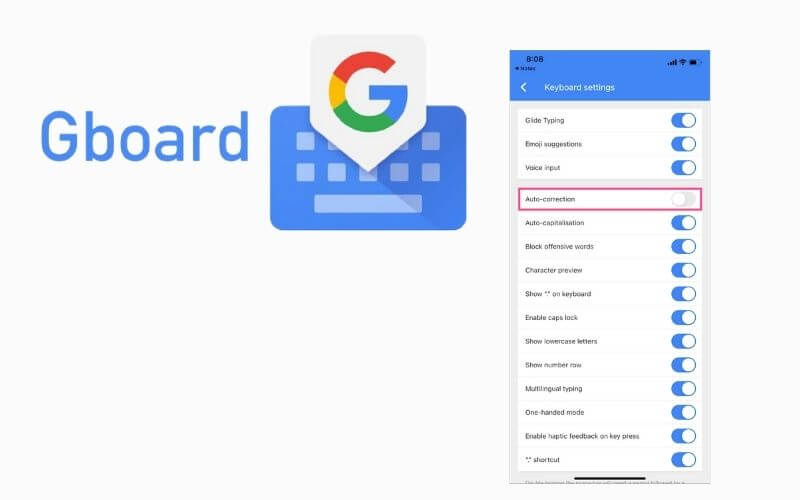
From Gboard (Google Keyboard)
The steps to be followed to deactivate or activate automatic correction on the Google keyboard are explained below, from the app itself.
- Open any application that allows the keyboard to be displayed.
- Click on the Google icon (the button with the letter “G”).
- Click on the cogwheel or gear button
- Select ” Spell check “.
- Slide until you find the option ” Automatic correction ” and deactivate the lever by pressing on it.
By following these guidelines, you can disable Gboard’s automatic correction from its own settings menu.
It should be clarified that to activate this function again, you simply have to follow the same procedure in reverse. That is, move the lever again in step 5, so that it is blue.
Now, if you want to do it from the mobile settings menu, you must enter the path Settings> System> Languages and input> Virtual keyboard> Gboard> Spell correction.
Once there, you must deactivate the “Automatic correction” lever, in this way the autocorrect will be disabled. However, it can be activated again by following the same procedure.
SwiftKey
The SwiftKey keyboard also incorporates an automatic corrector that can be easily disabled , either from the options menu of the app itself or by entering the system settings .
Therefore, the steps necessary in each case are described below.
- Click on the button with the parallel arrows
Click on the button with the three ellipsis (…).
Select ” Settings .”
Press ” Write .”
Click on ” Writing and autocorrect ” in the next window.
Deactivate the “ Auto Correct ” lever .
This will stop the SwiftKey autocorrect from working . It is worth mentioning that this is something that can be reversed at any time you want, you simply have to repeat the process in reverse. In other words, activating the “Auto-correct” lever again.
On the other hand, entering the path Settings> Advanced settings> Language and text input> SwiftKey Beta keyboard> Writing> Writing and auto-correction, you can also disable automatic correction.
It is worth mentioning that, for this, it is necessary to slide the lever of the “Auto-correct” function, so that it is gray.
Huawei Smartphones
Huawei Smartphones come with their own “Swipe Huawei” keyboard, which has the auto-correct function. To deactivate it, a procedure similar to the one described below must be followed:
- Open any application that allows the keyboard to be displayed.
- Press and hold the button with the hand icon in the lower left corner of the screen to open the keyboard settings menu.
- Press ” Options “.
- Deactivate the “ Auto Correction ” lever .
By doing so, the auto-correction of the mobile will be deactivated . However, if desired, it can be activated again by following the same steps in reverse.
On Samsung Smartphones
In the case of having a Samsung mobile, follow the instructions described below to turn off the automatic correction function:
- Open any application that allows the mobile keyboard to be displayed.
- Click on the cogwheel icon .
- Press ” Smart Typing “.
- Select ” Automatic Corrector “.
- Deactivate the lever of the language set for the autocorrect by pressing on it .
In this way, you can turn off the autocorrect on Samsung Smartphones . It should be clarified that, to activate it again, it is enough to repeat the same procedure, but moving the lever to the right side.
Similarly, you can disable the predictive text option . This will prevent the phone from trying to fill in the text you are typing.
Add or remove words in your personal dictionary
One thing you can use to prevent the autocorrect from replacing words as you type is to add them to your personal dictionary.
In this way, you avoid deactivating the automatic correction of the cell phone. Now, to do so, it is necessary to go to Settings> System> Languages and income> Advanced> Personal dictionary.
It is important to note that this may vary on each device, depending on its Android version or computer model.
Once there, it is necessary to click on the “+” icon located in the upper right corner to add the word.
This will open a new window in which you must type the term in question and touch the green checkmark button in the lower right corner of the keyboard.
Then, all you have to do is go back to the previous screen and you can see the new word. Now, to delete it, you must click on it and, later, on the trash can icon that is located in the upper right corner of the screen.
Other keyboard configurations
In addition to being able to add words to the personal dictionary, within the keyboard menu there are additional settings or functions, such as :
- Personalization : allows you to change the appearance of the keyboard , replacing the default theme with any other available one or even a photograph from the mobile gallery.
- Gesture Typing : This feature is ideal for typing words by connecting letters to each other , without lifting your finger from the screen.
- Advanced functions : within this section you can set functions such as the delay in pressing the keyboard, row of numbers or symbols that appear on it, emojis, etc.
It is worth mentioning that some applications such as Gboard or SwiftKey have additional buttons.
Some of them allow you to write by voice command, translate what you type, change the keyboard layout to make typing more comfortable, among others.
As could be seen, it is possible to activate or deactivate the device’s autocorrect to prevent it from replacing words while writing, you just have to follow each of the steps mentioned in this post according to the device you have.
We are always open to your problems, questions, and suggestions, so feel free to Comment on us by filling this. This is a free service that we offer, We read every message we receive.
Tell those we helped by sharing our posts with friends or just liking to Follow us on Instagram, Twitter and join our Facebook Page or contact us Gmail, Linkedin, etc

Pradeep Sharma is a author the mind behind Techjustify, where I craft insightful blogs on technology, digital tools, gaming, AI, and beyond. With years of experience in digital marketing and a passion for tech innovation, I aim to simplify complex topics for readers worldwide.
My mission is to empower individuals with practical knowledge and up-to-date insights, helping them make informed decisions in the ever-evolving digital landscape.